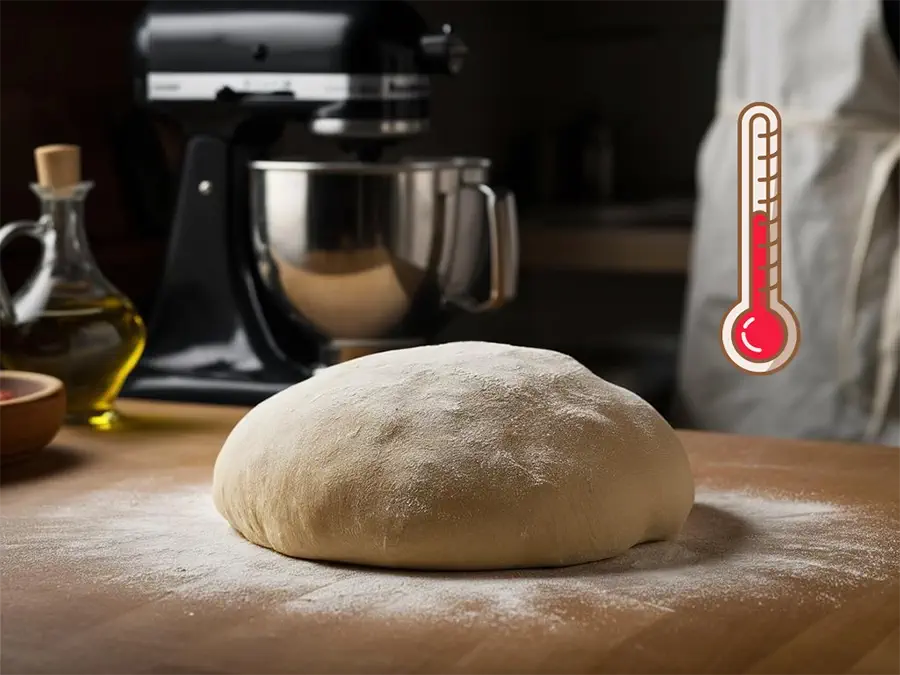
How to Ferment Pizza Dough at Room Temperature: A Practical Guide
Room temperature fermentation is generally more challenging than cold fermentation, but it is also more rewarding, allowing you to develop a dough with richer flavors in less time. In this article, we’ll explore how to carry out room temperature fermentation correctly, and how, by following a few key principles, you can achieve consistent and high-quality results – even at room temperature
Introduction: Room Temperature Fermentation
In baking, room temperature fermentation refers to any fermentation carried out outside the fridge – typically within a temperature range of 15–30°C (59–86°F).
For a detailed comparison between room temperature and cold fermentation, see: Room Temperature vs. Cold Fermentation for Pizza Dough: Differences, Advantages, and Drawbacks.
Room temperature fermentation generally allows for much faster flavor development compared to cold fermentation, producing flavor and texture that most people prefer. It also enables same-day pizza making, without compromising quality.
That said, room temperature fermentation is often more challenging than cold fermentation. It demands precision, careful attention, and skill to achieve consistent results, with a smaller margin for error and a shorter usability window. In other words: high risk, high reward.
In the sections below, we’ll outline the key principles of room temperature fermentation and show how to manage its variables to consistently produce high-quality dough at room temperature.
Principles of Room Temperature Fermentation
Here are the key principles for achieving successful and consistent room temperature fermentation:
- Adjusting yeast based on fermentation conditions: Adjusting the amount of yeast according to the desired fermentation time and temperature. This is the most critical factor for room temperature fermentation, and can be calculated using PizzaBlab’s dough calculator.
- Maintaining a stable fermentation temperature: Consistent temperature throughout the fermentation period is essential for good, predictable results.
- Controlling final dough temperature: Also crucial for predictable fermentation results.
- Using yeast correctly: Proper handling and activation of yeast help prevent inconsistent fermentation.
- Adjusting the flour to the fermentation conditions: Using flour that is strong enough.
- Analyzing and learn from results: Observing outcomes and adjusting variables as needed to refine your fermentation process.
Adjusting Yeast Amount for Temperature and Fermentation Time (Using PizzaBlab’s Dough Calculator)
The foundation of successful room temperature fermentation – and the most important principle to follow – is adjusting the amount of yeast according to the fermentation time and temperature.
For more on how yeast quantity affects fermentation and why it must be tailored to time and temperature, see: What Affects How Fast Pizza Dough Ferments – and How You Can Control It.
This adjustment can be easily calculated using PizzaBlab’s dough calculator, which determines the amount of yeast needed based on your specific fermentation conditions.
The calculator is used daily by thousands of bakers and provides highly accurate yeast predictions.
It’s recommended to read the user guide before using it for the first time.
Calculating and Measuring Yeast for Room Temperature Fermentation
The amount of yeast required for room temperature fermentation is typically very small – often less than a gram, depending on dough quantity.
For example, fermenting 500 grams of dough at 25°C (77°F) for 6 hours requires just 0.2 grams of dry yeast.
Because these quantities are so small, precision is critical. To achieve consistent results, it’s necessary to use a scale capable of measuring with 0.01-gram accuracy.
Fortunately, such scales are inexpensive. For convenience, here are links to purchase a highly accurate 0.01-gram scale:
Aliexpress: Link to purchase (ensure the 0.01 g option is selected)
Amazon: Link to purchase
Why Does PizzaBlab’s Calculator Recommend Such a Small Amount of Yeast?
You may be accustomed to recipes that call for much larger amounts of yeast than what PizzaBlab’s calculator suggests for room temperature fermentation.
For example, many online recipes recommend roughly 2% dry yeast (in baker’s percentages) – for instance, a tablespoon of dry yeast (about 10 grams) for 500 grams of flour. Obviously, most of these recipes do not specify the fermentation temperature or time.
By comparison, using PizzaBlab’s calculator for a short 3-hour fermentation at 24°C (75°F) gives about 0.2% yeast – ten times less than the typical recipe. If the fermentation is extended to 5 hours, the yeast amount drops to about 0.1%, a twenty-fold difference.
So why the huge difference? This is due to several factors:
- Many recipes are designed to be “fool-proof.” Large amounts of yeast ensure the dough rises reliably under any fermentation conditions.
- Recipes target beginners. It’s simpler to instruct someone to use a “tablespoon of yeast” than to calculate the precise amount based on temperature and fermentation time.
- Limited awareness. Some recipe writers may not realize the importance of matching yeast quantity to fermentation conditions or its impact on flavor and texture.
- Lack of precise tools. Accurately calculating tiny yeast amounts was difficult before calculators like PizzaBlab’s became available.
In short, using a high amount of yeast is a practical shortcut that guarantees success for most bakers; BUT, it comes with notable drawbacks that can significantly compromise dough quality:
- Accelerated leavening, not ripening: A large quantity of yeast produces excessive CO2*, causing the dough to rise, but it doesn’t allow sufficient time for maturation and flavor development.
- Off-flavors and odors: Excess yeast can create a musty, “wet newspaper” taste or smell*, masking the nuanced flavors developed during proper fermentation.
- Short usability window***: Dough with too much yeast must be baked at precisely the right time; even a small delay can negatively affect results.
*Many recipes include a “degassing” step because dough with excessive yeast produces gas so rapidly that it must be managed to maintain structure. In contrast, properly balanced dough with the right yeast amount rises and ripens in harmony, eliminating the need for degassing.
**In long-fermented dough, flavor comes from the byproducts of yeast activity, not the yeast itself. Excess yeast introduces undesirable flavors and aromas, such as the musty smell described above.
*** “Usability window” refers to the period when dough is at its ideal fermentation stage – neither under- nor over-fermented – and will deliver the best baking results. The larger the usability window, the longer the dough can be used after reaching peak fermentation, while still maintaining optimal handling properties and baking performance.
In summary: using the correct amount of yeast is crucial – avoiding excessively high or disproportionate quantities ensures proper fermentation. While amounts as small as 0.15 grams may initially seem surprisingly low, this is actually the ideal way to ferment dough at room temperature.
Clarification on Yeast Amounts in Room Temperature Fermented Dough
Important: The amount of yeast is a tool for successful fermentation – not the goal itself.
A dough with less yeast is not automatically “better” or of “higher quality”. What truly determines dough quality is the dough-making and fermentation process. The key to good results is matching the yeast amount to the fermentation conditions (time and temperature).
Remember: the final yeast amount is calculated as follows:
Choose a fermentation time and temperature → Calculate the yeast percentage → Multiply this percentage by the flour weight in the dough → get the actual yeast amount.
[All of the above is handled automatically by PizzaBlab’s calculator.]
For example, consider two doughs that are identical except for flour quantity:
- Dough A: 200 grams of flour, fermenting at 16°C (61°F) for 2 hours
- Dough B: 1,500 grams of flour, fermenting at 16°C for 2 hours
According to PizzaBlab’s calculator, the yeast amounts would be:
- Dough A: 2.2 grams (1.11%)
- Dough B: 16.5 grams (1.11%)
In the example above, dough A is not inherently “better” than Dough B simply because it contains less yeast. Both doughs, with the same fermentation conditions and yeast percentage, will yield the same results. The absolute amount of yeast is not important by itself – the percentage relative to the flour is what matters.
It’s important to emphasize (again): a lower absolute yeast amount does not equal a better or higher-quality dough. Different flour quantities, fermentation times and temperatures naturally result in different absolute yeast amounts. The only factor that defines dough quality (in terms of fermentation) is how well the dough has been fermented – not the final yeast weight. The yeast amount is a means to an end, not the end itself.
In summary: Focus on adjusting the yeast amount to match the fermentation conditions, rather than on the absolute quantity. A higher yeast amount is not inherently “bad”, as long as it is correctly adjusted to the dough weight and fermentation conditions.
Entering Fermentation Time into the Calculator
The fermentation time entered in the calculator represents the total period during which the yeast is active in the dough – from the moment it is mixed, until baking.
In practice, this starts after the initial kneading is complete, and continues until baking. Any stretch-and-folds or balling of the dough is included in this period, since the yeast remains active throughout.
For example, if you make the dough at 12pm and plan to bake it at 9pm, the fermentation time to enter in the calculator is 9 hours – regardless of how many folds you perform or when you shape the dough into balls.
Once water, flour, and yeast are combined and kneaded into a dough, the yeast immediately begins its work, marking the start of fermentation. Subsequent actions like folding, shaping, or balling the dough do not pause this process; all time during which the yeast is active counts toward the total fermentation time.
Maintaining a Constant and Stable Fermentation Temperature
Maintaining a consistent/consistent fermentation temperature is crucial for achieving predictable results at room temperature. Since the target temperature is meant to be steady rather than fluctuating, it’s essential to ensure the dough actually ferments at that chosen temperature throughout the entire process.
The higher the fermentation temperature – or the longer the fermentation time – the smaller the margin for error. Even slight deviations can accelerate or delay fermentation, resulting in dough that is either ready too early or not ready on time.
In general, a 1°C (2°F) variation is acceptable, but larger fluctuations, especially when precision is required, can compromise fermentation quality and the desired outcome.
Using a Temperature Sensor to Monitor Room Temperature and Finding an Ideal Fermentation Spot
If you plan to ferment dough at room temperature regularly, investing in a simple temperature sensor is recommended. This allows constant monitoring of the room temperature and accurate entry into the calculator.
Here are links to purchase a temperature sensor:
Purchase from Amazon
Purchase from Aliexpress
Once you have a sensor, test different areas in your kitchen or home to find the spot with the most stable temperature.
Keep in mind that air conditioning or heating affects room temperature, and consequently, the dough’s fermentation rate. If fermenting in an air-conditioned room, ensure the temperature at the dough’s location matches the AC setting. Avoid intermittent use of AC or heaters during fermentation, as this can cause significant temperature fluctuations.
For rooms with air conditioning, using the iFeel function is recommended. This feature allows the AC to operate based on the temperature measured by a sensor in the remote control, rather than a sensor elsewhere in the unit or room. Place the remote near the dough and keep it there throughout fermentation to maintain a consistent temperature at that specific location.
Using a Wine Cooler for Dough Fermentation
A wine cooler is an excellent option for fermenting dough at stable room temperature, especially between 15-20°C (60-68°F). Despite the name, wine coolers don’t have to operate at cold temperatures; most models allow adjustment between 4-22°C (39-72°F).
Technically, the maximum temperature on most wine coolers is 18-22°C (64-72°F), so they are not suitable for fermenting dough at higher temperatures.
There are two main types of wine coolers:
- Compressor Wine Coolers: Work like standard refrigerators, maintaining uniform temperatures with deviations of up to 1°C (2°F). They are largely unaffected by ambient temperature, usually operate between 4-20°C (40-68°F), and tend to be more expensive.
- Thermoelectric Wine Coolers: These operate without a compressor, using the Peltier effect and internal fans. They are quiet, energy-efficient, and more affordable, but less precise (with deviations of 1–2°C / 2–4°F). They are sensitive to ambient temperature and can typically only cool to 10–15°C (18–27°F) below the surrounding temperature. For example, in a 30°C (86°F) room, the cooler may reach only 15–20°C (59–68°F).
For dough fermentation, a thermoelectric cooler can provide a sufficiently stable temperature if the ambient temperature is not too high. Before purchasing, ensure the cooler’s internal dimensions can accommodate the volume of dough you typically prepare (or the container holding the dough).
Controlling Dough Temperature at the End of Kneading (Final Dough Temperature)
For more on final/desired dough temperature, see: Final Dough Temperature (Finished/Desired Dough Temperature): Why It’s Important and How to Control It.
The final dough temperature (FDT)– the temperature of the dough at the end of kneading – has a direct and significant impact on the rate of fermentation, both short-term and throughout the entire process.
In general:
- Higher final dough temperature → Faster fermentation
- Lower final dough temperature → Slower fermentation
This applies to all doughs under any fermentation conditions.
For example, consider two identical doughs fermented under the same conditions, differing only in final dough temperature:
Dough A: 20°C (68°F)
Dough B: 27°C (86°F)
Dough B will rise noticeably faster due to its higher final dough temperature, even though the doughs are otherwise identical.
The effect of final dough temperature is especially critical during room temperature fermentation, where the margin for error is small. A too high FDT can make the dough reach over-fermentation prematurely, while a too-low FDT may slow fermentation, leaving the dough under-fermented at the intended baking time.
For these reasons, controlling the final dough temperature is essential, particularly when fermenting at room temperature.
In general, it is recommended to target a final dough temperature between 23–27°C (73–81°F). This range provides optimal conditions for yeast activity, and is the reference range used by the PizzaBlab calculator. Maintaining this temperature ensures the best fermentation results, especially when using the yeast amounts suggested by PizzaBlab’s calculator.
To control final dough temperature, you can use PizzaBlab’s desired dough temperature calculator.
Using Yeast Correctly
For more on properly using yeast – fresh or dry – see: Best Practices for Using Yeast in Pizza Dough (Dry and Fresh).
Here are key points to keep in mind, both generally and specifically for room temperature fermentation:
- Avoid adding dry yeast directly to cold water. If using cold water, first dissolve the dry yeast in a small amount of water at around 40°C (104°F) for about 10 minutes before adding it to the rest of the water, or sprinkle it directly over the flour. Fresh yeast can be added directly to cold water.
- Ensure even distribution of yeast. Room temperature fermentation typically requires very small amounts of yeast, so it’s important to mix it evenly into the dough. Using a mixer or kneader usually achieves this automatically. When hand-kneading, mix the yeast with water first before adding the other ingredients to ensure uniform distribution (see next bullet).
- Dry yeast and hand kneading. When hand-kneading with dry yeast, it’s best to dissolve the yeast in warm water first (as described above) before adding it to the rest of the water. Avoid adding dry yeast directly to cold water.
Adjusting the Flour to the Fermentation Conditions (Using Flour That Is Strong Enough)
For more information on adjusting the flour to the fermentation time, see: The Complete Guide to Pizza Flour, section ‘Flour and Fermentation Times‘.
During fermentation, as part of the dough’s ripening process, the gluten is gradually degraded by protease enzymes. Excessive or prolonged protease activity leads to over-fermented dough.
The higher the fermentation temperature, the more active these enzymes become – resulting in faster gluten breakdown. Likewise, the longer the fermentation time, the longer the enzymes have to work, which further weakens the gluten network:
- Higher fermentation temperature → higher protease activity → more gluten breakdown
- Longer fermentation time → protease active for longer → more gluten breakdown
Stronger flours (with higher protein content) naturally resist this breakdown better. The extra gluten they contain allows them to withstand more intense fermentation without collapsing or losing structure.
Simply put: the stronger the flour, the more resistant it will be:
- To longer fermentation times
- To higher fermentation temperatures
In conclusion: The longer the fermentation time and the higher the temperature, the stronger the flour you should use.
There is no universal chart that matches flour strength to fermentation conditions – it depends on both the flour’s protein quality & quantity and the specific time–temperature combination of your dough.
For example:
A 10-hour fermentation at 16°C (61°F) is roughly equivalent (in terms of ripening and gluten breakdown) to a 4-hour fermentation at 25°C (77°F) – medium-strength flour can work in both cases.
A 30-hour fermentation at 20°C (68°F) or a 12-hour fermentation at 26°C (79°F) will require strong flour to avoid dough that has over-fermented prematurely.
The only way to know for certain is to experiment with different flours under your exact conditions.
As a rule of thumb: for room temperature fermentation, start with at least a medium-strength flour, and as conditions become more “demanding” (longer times and/or higher temperatures), move toward stronger flour.
Drawing Conclusions
If the dough does not ferment as expected, analyze the fermentation process to improve future results. Things to consider:
- Was the actual ambient temperature higher or lower than planned?
- Was the yeast amount correct?
- Was the final dough temperature accurate and within the recommended range?
- Was the yeast used correctly?
- Was the flour you used strong enough?
Reflecting on these factors and making adjustments for the next batch will help you improve your baking overall, and particularly your room temperature fermentation results.
Bonus: Tips for Making “Emergency Dough” (Very Short-Fermented Dough at Room Temperature)
Emergency dough, as the name implies, is designed to be prepared quickly – “in an emergency.” The term originated in pizzerias that needed dough ready as fast as possible, sometimes within just an hour from the end of kneading to baking.
Essentially, emergency dough undergoes a very short fermentation at room temperature (usually up to two hours) to be ready for immediate use.
Because of the limited fermentation time, this dough will be relatively bland and lacking in flavor.
There are two main goals when preparing emergency dough, relating to the rising and ripening processes of dough:
- Rising Processes: The dough must gain enough volume through gas production. These processes depend almost entirely on the amount of yeast, so emergency dough typically contains a relatively high yeast quantity.
- Ripening Processes: The dough must become extensible enough to work with, stretching into a pizza base without resisting or shrinking back. Unlike gas production, ripening and flavor development take time, so emergency dough usually lacks in this area.
“Accelerating” the dough’s rising is easy – simply use more yeast. But what about speeding up ripening? Partially, this can be achieved by using a higher fermentation temperature.
Since fermentation temperature directly affects the dough’s internal processes, increasing it will speed up ripening, allowing the dough to develop more quickly within the same short time frame.
For emergency dough, aim for the highest possible fermentation temperature, (within reason – up to about 35°C/95°F.
For example: Two identical doughs fermented for 2 hours:
Dough A: 20°C (68°F) → slower ripening
Dough B: 30°C (86°F) → faster ripening
In the above example, dough B ripens much more/faster within the same time period.
Additional Principles for Preparing Emergency Dough:
- Adjust Yeast Carefully: Even for emergency dough, match the yeast amount to the fermentation time and temperature (using the PizzaBlab calculator). Too little yeast = under-fermented dough; too much yeast = overly rapid fermentation and possibly off-flavors.
- Adequate Kneading: Short fermentation does not allow sufficient biochemical gluten development, so aim for strong gluten development during kneading. For emergency dough, passing the windowpane test at the end of kneading is recommended.
- Use Weak-to-Medium Strength Flour: Dough made from high-protein, strong flour may not have time to “soften” during a short fermentation, resulting in a very elastic dough that resists stretching. Weak- to medium-strength flour produces more workable dough in short fermentation durations due to their lower protein (gluten) content.
- High Final Dough Temperature: As noted earlier, a higher final dough temperature accelerates the dough’s internal processes, including ripening. For emergency dough, aim for 28-30°C (82-86°F) FDT to speed up and maximize ripening.
Enjoy the content on PizzaBlab? Help me keep the oven running!


Hi Yuval,
Thank you for a very interesting and detailed article. I usually work with RT doughs in the 18–24h range, but I find them quite tricky to handle. I’ve experimented with different bulk/balling ratios, yet the dough still tends to feel overly extensible and slack once balled, spreading out quite fast. To exclude the flour as a variable, I’ve been using a strong W380, and hydration has been kept around 60–65%. Despite that, the dough surface feels tacky and lacks the tension I would expect at that stage.
Hi Arto,
What’s your fermentation temperature? At room temp, 18-24 hours is really pushing the limit, especially if your fermentation temperature is on the higher side (say above 22C/72F). With such long RT fermentation at relatively high temps, excessive gluten degradation is almost inevitable, which is why your dough ends up overly extensible and slack, even with strong flours.
I’d suggest shortening the fermentation to around 12 hours and seeing if that gives you a more manageable dough. Also, make sure the other fermentation variables are dialed in (final dough temperature, yeast quantity, maintaining a stable fermentation temperature, etc.), since these all have a big impact as well.
Thanks Yuval good to know! I’ll definitely try shortening the fermentation a bit. Room temp here is typically 23–24 °C and FDT around 24–25 °C, so I can see how that might be pushing the gluten too far over 18–24h. I’ve been estimating yeast quantities with the Pizzablab calculator.
Sounds ideal. Let me know how it goes!
Hi Yuval,
The 12h dough turned out well. I also tried a 23h fermentation in the wine cooler (18 C), and the results were really promising. I’ll keep experimenting with sub 20C temps since the dough was also easier to handle.
Awesome!
Hi Yuval,
Thanks for the great info. I usually do 20-24h fermentation at 16°C (in wine cooler). I am aiming for neo Neapolitan style, however my pizza lacks the desired oven spring (too dense, not cloud like). Do you think the gluten degradation by protease is the culprit in this case? BTW i am using Caputo Chef. The oven temp should not be a problem.
Thanks,
-Ivan
Hi Ivan,
Excessive gluten degradation (i.e. over-fermentation) is indeed a possibility, although it’s difficult to say for sure without knowing your full dough-making and baking process, and ideally, seeing photos of the dough and the baked pizza.