
How to Properly Freeze Pizza Dough: A Science-Backed Guide
Freezing pizza dough is a convenient way to ensure you always have dough ready for use, but it is more complex than simply placing leftovers in the freezer. Suboptimal freezing can damage yeast cells and ruin the dough’s structure, leading to sticky, unmanageable results. This article explores the science of dough freezing, and outlines the recommended approach to freezing and thawing your dough for optimal quality
The Science: How Freezing Impacts Dough Integrity
First and foremost, it’s vital to understand that frozen dough will never behave exactly like fresh dough.
When dough freezes, the water inside turns to ice and expands by approximately 9%. The speed of this freezing process, combined with how the dough is prepared, dictates the size of the resulting ice crystals—a factor that significantly impacts the dough’s final quality.
The Formation of Ice Crystals During Freezing
As dough freezes, the expansion of water creates microscopic ice crystals (which size and length are influenced by the freezing method). The formation of these ice crystals has three significant effects on the dough:
- Physical damage to yeast: The ice crystals puncture the yeast cells, causing damage and potentially killing them. During freezing, up to 50% of the yeast can be damaged, depending on the speed/method of freezing and the dough’s making process.
- Weakening of the gluten matrix: These crystals also puncture the gluten network, physically pushing strands apart and creating micro-fractures. This reduces the dough’s elasticity, gas-holding capacity, and overall structural strength.
- Glutathione leakage: Damaged yeast cells leak a substance called glutathione. Glutathione acts as a dough softener (a “reducer”) that breaks down gluten bonds, which further weakens the dough.
From this, three main conclusions can be drawn:
- Freezing causes significant damage to yeast cells, leading to glutathione leakage which weakens the gluten structure. Furthermore, these damaged yeast cells lose their ability to contribute to fermentation once the dough is thawed.
- Freezing physically disrupts the gluten matrix itself, resulting in a weaker, less elastic dough.
Yeast Cell Damage and Glutathione Leakage
A primary factor influencing the quality of frozen dough is the release of glutathione.
Because glutathione breaks down gluten bonds, it is actually used as a dough conditioner/improver in the form of “dead yeast” – but in this context, it is an unwanted side effect.
Since yeast cells are inevitably damaged by ice crystals during freezing, glutathione inevitably leaks into the dough. Generally, a less effective freezing process leads to more damaged cells and a greater release of glutathione.
Avoiding glutathione release is crucial. A high concentration of glutathione results in a dough that is too extensible, sticky, prone to tearing, and generally hard to handle. Beyond handling, excessive glutathione can also impact the bake, leading to limited oven spring or signs of over-fermentation.
Furthermore, the degree of yeast damage directly impacts how the dough ferments after thawing. The more yeast cells are damaged during freezing, the less active yeast remains, causing the dough to ferment much more slowly than desired.
If you have ever used frozen dough and noticed these issues, yeast cell damage during freezing is the likely culprit.
Physical Damage to the Gluten Matrix
Similar to the yeast cells, freezing damages the gluten matrix through ice-crystal formation, water migration, and protein denaturation. This results in a “slacker”, weaker dough, with compromised strength and gas retention.
The degree of this damage depends heavily on when the dough is frozen.
Minimizing Quality Compromise
To achieve optimal performance, the goal is to minimize yeast cell damage and reduce the compromise to the gluten structure.
In the next sections, we’ll explore how to accomplish this.
Freezing the Dough Before vs. After Fermentation: Why Timing Matters
A common question when freezing pizza dough is whether to freeze it before or after it has risen. To answer this effectively, we need to examine two distinct areas:
- The biological impact: How fermentation affects the dough’s vulnerability to freezing damage.
- The practical setting: How the requirements of a commercial pizzeria differ from those of a home kitchen.
How Freezing Timing Affects Dough Performance
During fermentation, yeast cells become more active and physically expand. The longer the dough ferments, the larger these yeast cells grow.
Simultaneously, while gluten bonds continue to form through biochemical gluten development, the overall gluten structure is also being gradually degraded and weakened by protease enzymes. This makes the dough more “relaxed” and chemically fragile.
This timing is critical, because larger yeast cells and a weakened gluten structure provide more “points of contact” for ice crystals, which significantly increases the likelihood of structural damage during the freezing process.
In practice, this leads to the following:
- Increased Cellular Damage: When dough is fermented before freezing, the expanded yeast cells suffer more damage, leading to more glutathione leakage.
- Structural Damage: Freezing after fermentation “strikes” a gluten network that is already stretched and chemically weakened. The same freezing conditions lead to much more severe structural damage and poorer gas retention compared to freezing the same dough before fermentation.
- Declining Performance: A longer fermentation period prior to freezing compounds these risks.
Therefore, to minimize structural damage and achieve maximum quality, the best practice is to freeze the dough before fermentation begins – ideally immediately after kneading.
The Consequences of Freezing Dough After Fermentation
Freezing dough that has already risen can lead to several performance issues:
- Gluten Network Degradation: The dough becomes softer, stickier, and more “fragile,” making it difficult to handle without tearing.
- Poor Bake Quality: Reduced gas retention leads to a lack of oven spring and a denser crumb.
- Inconsistency: Performance fluctuates significantly across different batches.
- Reduced Usage Flexibility: Once thawed, the dough must be used immediately; it generally cannot be held in the fridge for another day after being thawed.
Frozen Dough in Commercial Settings (Pizzerias and Restaurants)
In a commercial environment, consistency is the most important factor. A pizzeria cannot afford performance fluctuations; the dough must behave predictably across every batch, every hour of every day.
While flavor is important, commercial operators prioritize dough handling, texture, and predictability. They cannot risk the dough underperforming or behaving unpredictably during a busy service – risks that are much higher with dough frozen after fermentation.
For this reason, the vast majority of pizzerias using frozen dough (from major chains like Pizza Hut and Domino’s to local independent shops) use dough that has not been fermented before freezing.
This approach provides:
- Total Control: Operators can fully manage how the dough ferments after it is thawed.
- Predictability: It ensures high consistency between batches with a low risk of service issues.
- Optimal Texture: It provides the best possible handling and final crust texture.
In short, freezing before fermentation is the commercial standard, because it prioritizes performance and reliability.
Frozen Dough in Home Settings
In contrast to a commercial kitchen, using frozen dough at home is a different story.
First, home pizza-making is far less “demanding.” At home, we generally have the time and tolerance to cope with an underperforming dough.
If the dough is a bit sticky or difficult to stretch, we can simply take our time, be extra gentle, and ensure it transfers smoothly to the oven. A pizzeria serving hundreds of customers doesn’t have this luxury; every pizza must be at its best under time pressure.
Secondly, many home bakers freeze dough after fermentation primarily for convenience or to avoid waste.
Freezing leftover dough balls from a party is a common practice. While this dough will not perform nearly as well as fresh dough, for most home bakers, the results are “good enough” for a casual meal or for making other baked goods like flatbreads or dinner rolls.
Comparison Table: Freezing Before vs. After Fermentation
| Frozen Before Fermentation | Frozen After Fermentation | |
| Best For | Commercial use; when dough performance and consistency are the top priorities. | Home use; leftover dough balls; when dough performance is not a major concern. |
| Control Level | High (Allows for full control over fermentation after thawing). | Minimal-to-none (Once the dough is thawed, it must be used immediately). |
| Effect of Ice-Crystal Damage | Low-moderate weakening; the gluten network still retains gas well after thawing; minimal yeast damage. | Significant damage; higher gas-cell collapse, loss of elasticity, and substantial yeast death. |
| Effect on Dough Structure | Minimal damage (though some structural compromise is inevitable). | Significant damage; glutathione leakage and gluten disruption result in a weaker, more fragile, tear-prone dough. |
| Baking Performance | Good; minimal compromise in oven spring and crumb structure. | Reduced; limited oven spring and a noticeably denser crumb. |
| Sensitivity to Freeze–Thaw Cycles | Lower; the structure is more robust against temperature fluctuations. | Higher; quality drops rapidly with storage time and temperature swings. |
| Dough Usability Window (After Thawing) | Long (Dough needs time to ferment, offering a wider window of use). | Short (Dough is already fermented and loses its strength quickly). |
Note: The impacts of freezing described above vary based on your specific dough making process and freezing methods. While these effects can range from mild to severe, they will always be present to some degree; the goal of an optimal freezing protocol is to minimize them as much as possible.
Other Factors That Affect Frozen Dough Quality
Beyond the timing of the freeze, two additional factors play a critical role in the quality of your frozen dough:
- Freezing Speed: The efficiency of your freezer.
- Yeast Selection: The type and quantity of yeast used.
The Importance of Freezing Speed
The velocity at which dough freezes significantly impacts its final quality. Commercial freezers are far more efficient than home appliances; they freeze dough rapidly, which results in the formation of smaller ice crystals and significantly less damage to yeast cells.
For example, a 300g dough ball might take nearly a full day to freeze completely in a home freezer, whereas an industrial blast freezer can achieve the same result in just one hour.
Because home freezers are less efficient, we are at a disadvantage from the start, as the slower cooling rate causes greater damage to yeast cells.
To minimize this, it is crucial to use specific techniques (which we will cover in the step-by-step section) to facilitate the fastest possible cooling.
Choosing the Right Type of Yeast
The quality of your frozen dough is also heavily influenced by the specific type of yeast you select.
In general, fresh yeast is better suited for dough intended for the freezer. This is because fresh yeast undergoes minimal processing and drying compared to dry yeast, leaving the yeast cells more robust before they even enter the freezer.
As we discussed earlier, glutathione is released when yeast cell membranes are damaged. Because fresh yeast has more intact and robust cells, it results in less glutathione leakage into the dough. This allows the yeast to “survive” the freezing process more effectively and ferment the dough more efficiently once it is thawed.
Therefore, fresh yeast is preferred for two main reasons:
- Reduced Damage: It minimizes the release of glutathione, preserving the dough’s strength.
- Vitality: The yeast cells remain more active, ensuring a more reliable fermentation after thawing.
Adjusting the Amount of Yeast Used
Dough that is frozen under ideal conditions (before fermentation) must undergo a full fermentation cycle after it thaws. To ensure there is enough yeast activity to support this, we must account for the cells lost during the freezing process.
The solution is straightforward: to compensate for the yeast cells killed by ice crystals, you should use 1.5 to 2 times more yeast than your standard recipe requires. Since up to 50% of your yeast can be damaged or die during freezing, this increase ensures your post-thaw activity remains high.
For example:
- Standard Recipe: 1 gram of yeast.
- Frozen Version: 1.5 to 2 grams of yeast.
If you only used the original 1 gram, the loss of active cells during freezing would lead to insufficient yeast activity after thawing, resulting in frustratingly long fermentation times.
A Note on Timing:
– If freezing after fermentation: You won’t need to ferment further, but you will still face the negative consequences of glutathione release and structural weakness.
– If freezing before fermentation: By starting with a larger amount of yeast, you ensure that the population of active cells remaining after thawing matches the activity level of a fresh dough. This allows the dough to ferment exactly as expected.
In summary, increasing the yeast quantity acts as an “insurance policy”, ensuring that the dough ferments properly and predictably after its time in the freezer.
Summary: Key Factors for Ideal Pizza Dough Freezing
To achieve the best-performing and most consistent frozen dough, you should:
- Increase the Yeast: Use 1.5–2 times more yeast than you would for a “regular” dough. Fresh yeast is preferred for its resilience.
- Develop Strong Gluten: Ensure full gluten development during the initial kneading process to help the dough withstand ice crystal formation.
- Freeze Immediately: Divide the dough into balls and place them in the freezer immediately after kneading, before any fermentation occurs.
- Freeze Rapidly: Freeze the dough as quickly as possible. While a commercial or blast freezer provides the best results, aim for the coldest setting available at home.
By following these guidelines, you ensure the dough freezes optimally with minimal damage to the yeast and the gluten structure. Once thawed, the dough will perform as closely as possible to fresh dough.
In fact, this specific protocol is exactly what major commercial frozen dough manufacturers use to maintain quality.
But if we freeze the dough before it ferments, how are we supposed to use it?
How to Correctly Use Frozen Pizza Dough
Handling Dough Frozen Before Fermentation
Using dough that was frozen before fermentation is straightforward.
The first step is to thaw the dough, either at room temperature or in the fridge, until it reaches an internal temperature of approximately 15°C (59°F).
Once thawed, you should treat the dough as if it had never been frozen. Simply follow your original recipe’s intended fermentation temperature and duration:
- Cold Fermentation: If the dough is meant for a 24-hour cold ferment, thaw it first and then place it in the fridge for the full 24 hours.
- Room Temperature Fermentation: If the dough requires 4 hours at 25°C (77°F), thaw it first and then let it ferment for those 4 hours at that temperature.
In summary: thaw the dough, then ferment it as usual. (Refer to the step-by-step section below for more specific instructions).
Pro Tip: If you intend to cold ferment, you can transfer the dough directly from the freezer to the fridge. However, keep in mind that fermentation will take longer because the dough needs extra time to thaw and “activate” the yeast. For the most predictable results, it is better to thaw the dough at room temperature (until it hits 15°C/59°F) before moving it to the fridge for its fermentation period.
Managing Dough Frozen After Fermentation
If you are using dough that was frozen after it had already risen, you do not need to ferment it again. Simply allow the dough to reach a workable temperature, typically around 15°C (59°F). As soon as it is easy enough to stretch into a pizza base, it is ready to use.
The time needed to reach this temperature depends on the size of the dough ball and the ambient room temperature. You can thaw it in the fridge overnight and take it out 1 to 2 hours before baking, or thaw it directly at room temperature from the freezer.
Step-by-Step Guide: The Ideal Freezing Protocol
Below is a step-by-step guide for freezing pizza dough at home to achieve professional results, based on the ideal protocol described in this article.
How to Properly Freeze the Dough
1. Determine Fermentation Parameters: Decide on your desired fermentation time and temperature for the dough after it has been thawed. Using PizzaBlab’s dough calculator is recommended.
2. Adjust Yeast Amount: Increase your yeast quantity by 1.5 to 2 times. I suggest starting with a 1.5x increase; if the thawed dough ferments too slowly, increase the amount next time. If it ferments too quickly, reduce it.
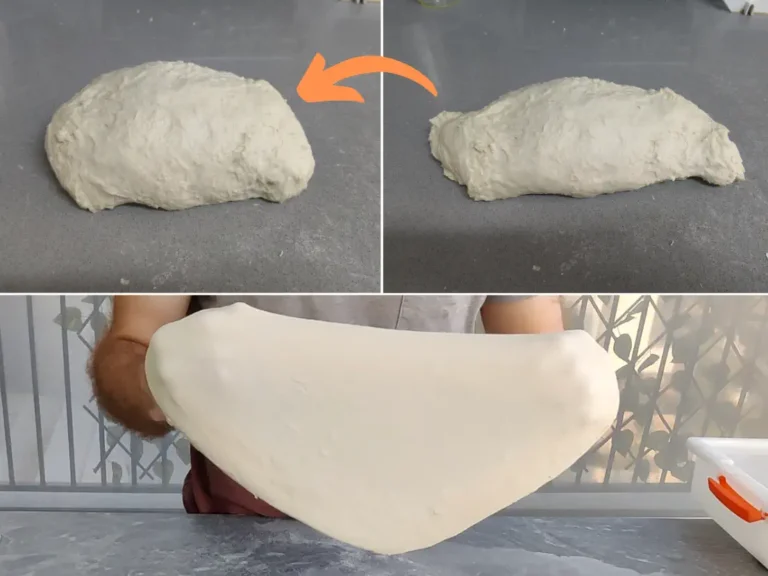
3. Make the Dough: Prepare the dough as usual, but aim for full or nearly full gluten development by the end of kneading. Use the windowpane test to verify that the gluten was sufficiently developed.
4. Aim for a Low Final Dough Temperature: Try to keep your final dough temperature as low as possible, preferably no higher than 20°C (68°F), to give it a head start on rapid freezing.
5. Divide and Shape: Immediately after kneading, divide the dough into individual portions. Flatten each ball into a “puck” or disc shape about 3 cm (1.5 inches) thick. This flatter shape increases the surface area, helping the core of the dough cool much faster.
6. Store in Containers: Place each flattened dough ball in a container or plastic bag. It is ideal to lightly oil the dough or the container to ensure an easy release after thawing.
7. Freeze: Transfer the dough balls to the coldest spot in your freezer (typically near the air vents) to ensure the most rapid freezing possible.
Using the Dough: Thawing and Fermentation Workflow
1. Thaw the Dough: When you are ready to use it, thaw the dough in the fridge or at room temperature until it reaches an internal temperature of about 15°C (59°F).
Tip: It is generally better to allow the dough to thaw slowly in the fridge rather than at room temperature. Slow thawing prevents excessive condensation and the formation of water droplets that can negatively affect the dough’s surface texture.
2. Ferment the Dough: Once the dough has reached 15°C (59°F), proceed with your normal fermentation process according to your intended duration and temperature.
If your regular process involves balling or reballing the dough at a specific point, apply that same timing here. For example, if you typically ball the dough after 50% of the fermentation time has passed, do the same with the thawed dough. Essentially, follow your usual fermentation procedure as if the dough were fresh.
Shelf Life and Quality: How Long Can You Store Frozen Dough?
An optimal freezing process ensures that the dough performs at its peak for up to two weeks after freezing. Beyond this two-week window, the dough’s quality becomes less predictable, ranging from very good to poor.
Over time, the dough’s integrity will inevitably decline. While frozen dough remains usable for three months or more, it will not produce the same level of quality or the same results as dough used within the first fourteen days.
From a health and safety standpoint, consuming dough that has been frozen for several months is completely safe. However, you should be aware that its handling properties will degrade, and the final texture of the pizza crust will be significantly affected.
Final Conclusions: What’s the Best Way to Freeze Pizza Dough?
The key to successful frozen pizza dough lies in damage mitigation. Because freezing inherently challenges the biological and structural integrity of the dough through ice crystal formation and glutathione leakage, the “best” method depends on your specific goals for the final bake.
To achieve results that are nearly indistinguishable from fresh dough, you should follow the professional protocol: increase your yeast by 1.5–2x, develop a strong gluten network, and freeze the dough immediately after kneading.
This “ideally frozen” dough allows you to maintain total control over fermentation after thawing and results in a superior crust with excellent oven spring.
However, if you are a home baker looking for convenience and are less concerned with a “perfect” professional-grade crumb, freezing already-fermented dough is a viable way to reduce waste.
While the dough will be slacker and more fragile due to the chemical breakdown of the gluten, it can still produce a satisfying home-cooked meal.
The Choice is Yours:
- Choose the Professional Method if you want consistency, predictability, and a high-quality crust that mimics a fresh bake.
- Choose the Post-Fermentation Method if you prioritize convenience and are simply trying to save leftover dough for a casual meal.
If you have leftover dough balls after a pizza party, I strongly recommend baking them that day to make frozen pizzas instead of freezing the dough. This way, you can avoid the quality loss associated with sub-optimal frozen dough, and create ready-to-eat pizzas with minimal effort (just heat up the oven and reheat the frozen pizza).
Key Takeaways
- Yeast Damage & Glutathione Leakage:
Freezing creates ice crystals that physically puncture yeast cells. This not only kills a portion of the yeast, but also causes the release of glutathione, a substance that acts as a dough softener and breaks down gluten bonds. This is the primary reason why thawed dough often feels excessively sticky, slack, and weak. - Gluten Matrix Damage:
Freezing doesn’t just kill yeast; it physically damages the gluten network. As water freezes, ice crystals expand and act like tiny needles, puncturing the gluten “strands” and weakening the overall structure. This results in a dough with less gas-holding capacity and a poorer oven spring. - Freezing Before vs. After Fermentation:
- Before Fermentation: Freezing immediately after kneading is the “gold standard.” It results in the highest quality because the yeast is less active and more resistant to damage.
- After Fermentation: Freezing “leftover” dough is convenient but technically inferior. The larger, more active yeast cells are easily killed, and the gluten structure is already stretched, making it more vulnerable to ice crystal damage.
- Choosing the Right Method:
- Commercial/Best Performance: Freeze immediately after kneading. This ensures the best consistency, volume, and handling – essential for professional settings.
- Home/Convenience: Freezing after fermentation is acceptable for saving leftovers, but expect the dough to be slacker and harder to stretch.
- Yeast Selection:
Fresh yeast is best for frozen dough, because its cells are more robust and suffer less damage during the freezing and thawing cycles compared to dry yeast. - Freezing Speed:
Faster is always better. Rapid freezing creates smaller ice crystals, which cause less physical damage to both the yeast and the gluten matrix. - Storage Life:
While frozen dough is safe for months, its structural integrity and yeast power begin to decline significantly after two weeks.

Enjoyed this article? Join the BLAB
Unlock the Key Takeaways above and enjoy a 100% clean, ad-free experience across the entire site.


Awesome, thanks. Looking forward to the next topic: “how to freeze a fully baked pizza” 🍕