Pizza Stone vs Steel: The Complete Baking Surfaces Guide
The baking surface is the most critical tool for controlling how the bottom of your pizza bakes. While the top is cooked primarily by radiation and convection, the base relies almost exclusively on conduction – heat transferred directly from the surface. This article explores the physical properties governing this process, including thermal conductivity, heat capacity, and emissivity, along with in-depth comparison of common materials like cordierite, baking steel, and biscotto stone, to help you choose the best material for your setup and crust preferences
Introduction: Understanding the Thermal Properties of Pizza Baking Surfaces
Before diving into the specifics of baking surfaces, it’s important to understand the thermal properties that make each one unique.
You don’t need an in-depth grasp of the physics, but a basic understanding of these properties and their impact will help you understand the actual differences between materials and how they influence pizza baking.
Note that I will be using metric measurements and units throughout the article.
Before continuing, I highly recommend reading the article How Pizza is Baked: Understanding the Thermodynamics of Pizza Baking. It offers a strong foundation in the theory and physics of pizza baking, making it easier to fully understand the details discussed below.
Specific Heat Capacity
Specific heat capacity is the amount of energy needed to raise the temperature of one unit mass of a substance (e.g., one gram) by one degree Celsius (or Kelvin, as both are equivalent in magnitude).
For pizza hearth materials, a material’s heat capacity determines its ability to store heat. The higher the heat capacity, the more energy is needed to raise its temperature, meaning it can store more heat for the same mass.
In simpler terms: the higher the heat capacity of a baking surface, the more heat it can retain.
Specific heat capacity is measured in J/(g⋅°C), which represents the energy in joules required to raise the temperature of one gram of the material by one degree Celsius.
When “heat capacity” is mentioned throughout the article, it refers to specific heat capacity.
Density
Density is the mass of a material per unit volume, or, in simpler terms, how “dense” the material is.
In the context of baking surfaces, the density of a material directly affects its ability to store heat. Generally, the denser the material, the more heat it can store per unit of mass (weight).
Density is measured in units of mass per volume. In this article, I will use grams per cubic centimeter (g/cc).
Heat Storage Capacity
“Heat storage capacity” is not a fundamental physical property but a derived one, calculated by combining the two properties mentioned earlier: heat capacity and density. It essentially measures how much heat a material can store per unit volume, based on the material’s specific heat and density.
The calculation for heat storage capacity is simple: heat capacity * density.
For illustration, let’s assume we have two identical baking surfaces, with the only difference being the density of the material. Let’s say the first surface has twice the density of the second.
In this case, the denser surface will be able to store twice as much heat as the less dense one. In simpler terms: the denser surface has “more material” in the same volume, allowing it to store more heat.
The denser surface will also be twice as heavy, even if both surfaces have the same dimensions (size and thickness). For example, a baking steel (which will be discussed in detail later) is four times denser than a pizza stone, making it much heavier for the same volume.
Based on this example, if we wanted to match the heat storage capacity of the two surfaces, we’d need to use twice as much material for the less dense surface. In simpler terms: to achieve the same heat storage capacity, the less dense surface would need to be twice as thick.
The heat storage capacity is crucial because it allows us to directly compare two materials. As we’ll see later, different surfaces have varying densities and heat capacities. The only way to make a true apples-to-apples comparison of their ability to store heat is by comparing their heat storage capacities.
Thermal Conductivity: The Speed of Heat Transfer
Conductivity is the ability of a material to transfer and absorb heat efficiently, or, in simpler terms, how quickly heat moves from the surface to the food placed on it. You can read more about conductivity in the link provided at the beginning of this article (recommended).
Conductivity is a key property for pizza hearth materials, and likely the most important one. In general, the more conductive the baking surface, the faster it can transfer heat to the pizza, delivering more intense heat to its base and essentially baking it faster.
Conductivity is measured in watts per meter Kelvin [W/mK], also known as the “k-value”.
The conductivity of a material also relates to its ability to absorb heat from the environment. A more conductive material will absorb heat more quickly. For example, baking steel, which is about 20 times more conductive than a pizza stone, will heat up much faster than a pizza stone of the same mass.
How the Baking Surface Properties Affect Baking and Performance
Baking the Bottom of the Pizza
The baking surface is responsible for baking the pizza’s bottom, making its role crucial. As we’ll see, different surfaces have unique thermal properties that directly impact the quality of the pizza’s base.
In general, the more conductive the surface, the more efficiently it will transfer heat to the pizza bottom. Simply put, the more conductive the surface, the faster the pizza bottom will bake.
As a (very) general rule, a more conductive surface is preferable when baking at lower temperatures, and vice versa. The logic is simple: at lower baking temperatures, there is less heat “available” to bake the bottom of the pizza. Therefore, to make the most of the available heat, a more conductive baking surface is often ideal.
For example, when baking at home oven temperatures (up to 300°C or 570°F), a highly conductive surface like baking steel is generally preferable. However, when using a wood-fired oven (which bakes at around 450°C or 850°F), a surface with low conductivity – such as biscotto or chamotte stone – is the better choice. These materials transfer heat more slowly and in a controlled manner, preventing the pizza bottom from overbaking.
Most professional pizza ovens (deck ovens) use a stone deck instead of a steel deck, even when the oven bakes at a temperature similar to that of a home oven.
The reason for this lies in the construction and operation of these ovens. Professional pizza ovens feature powerful heating elements or gas burners beneath the stone, providing continuous, intense heat. This ensures the stone remains saturated with heat and loses very little during baking.
In contrast, the baking surface in a home oven loses significant heat once the pizza is placed on it, and takes time to recover. In professional pizza ovens, using steel or another highly conductive surface would transfer too much heat to the bottom of the pizza.
Thus, even though professional and home ovens may bake at the same temperature, the ideal baking surface differs due to the distinct construction and operation of each.
Preheating and Recovery Time
The thickness and conductivity of a baking surface significantly impact its preheating time and recovery time between bakes (when baking multiple pizzas).
Here’s how thickness affects these factors (all things being equal):
- Thicker surfaces require longer preheating times, because they can absorb and store more heat.
- Thicker surfaces recover faster between bakes, because they lose a smaller proportion of their total stored heat during baking. While the actual amount of heat lost during baking is the same for both thick and thin surfaces, the thicker surface retains more heat overall due to its larger initial heat storage.
The conductivity of a surface also plays a role:
- More conductive surfaces preheat faster because they absorb heat more efficiently (i.e., faster).
- More conductive surfaces recover faster between bakes for the same reason – they “recover” lost heat quickly.
Below is a table summarizing how surface thickness and conductivity affect preheating and recovery times:
| Baking Surface Properties | Preheating and Recovery Times |
|---|---|
| Thinner | Shorter |
| Thicker | Longer |
| More conductive | Shorter |
| Less conductive | Longer |
The Impact of Surface Thickness on Baking
The thickness of the baking surface significantly impacts its ability to store and transfer heat. A surface that is too thin will struggle to store sufficient heat, limiting the amount it can transfer to the bottom of the pizza during baking.
How thick is “thick enough”? While we’ll explore this in greater detail later, here’s a general guideline:
– Steel: At least 0.8 cm (0.315″).
– Stone (any type): At least 1.5 cm (0.6″).
Surfaces thinner than these guidelines are likely to have inadequate heat storage, which can result in suboptimal baking for the pizza’s bottom.
Does Thicker Always Mean Better?
It’s worth noting that while a surface that’s too thin can negatively affect baking, the opposite isn’t necessarily true. Using a thicker surface will only improve baking up to a certain point.
A thicker surface won’t bake the pizza better than one that’s “thick enough.” In simple terms, the thickness of the surface benefits baking only up to a limit, after which further thickness offers no additional advantage for baking a single pizza. However, a thicker surface does play a role in reducing recovery times between bakes, as discussed in the previous section.
To illustrate:
Imagine a pizza requires 100 “heat units” (an arbitrary figure for clarity) to bake the bottom perfectly:
- A 1 cm thick surface stores 100 heat units, delivering the exact amount needed for ideal baking.
- A 0.5 cm thick surface, storing only 50 heat units, would fall short, resulting in underbaking or requiring longer baking times to compensate.
- A 2 cm thick surface, storing 200 heat units, wouldn’t improve the baking of a single pizza because the extra heat isn’t needed.
However, the 2 cm thick surface has an advantage: it can bake two pizzas in a row without requiring recovery time. Its extra stored heat means it can transfer enough heat for two pizzas before needing to reabsorb heat.
In short, thickness matters, but only to a practical extent. Beyond that, the benefits shift to operational efficiency rather than improved baking quality for individual pizzas.
Keep in mind that the rate of heat transfer from the surface to the pizza primarily depends on the surface’s conductivity and the temperature difference between the deck and the pizza. While conductivity remains unaffected by thickness, a thicker surface may maintain its temperature longer, influencing the overall heat transfer rate.
The Effect of Surface Porosity on Baking (Stones vs. Metals)
Contrary to common belief, pizza stones don’t absorb moisture from the pizza or contribute to a crispier crust. Any moisture escapes as steam and isn’t absorbed by the surface.
The Effect of the Surface on Volume and Top Browning
The baking surface may have a slight influence on oven spring (how much the dough rises or gains volume during baking) and on the browning of the pizza’s top.
The composition and fermentation state of the dough determines how and to what extent heat moves from the baking surface to the top of the pizza.
For example, if the dough is airy and filled with gases, the CO2 acts as an insulator, preventing heat from penetrating and reaching the top. In contrast, a denser dough allows heat to pass through more effectively and reach the top.
However, in most cases, the impact of the baking surface on these factors is relatively minor. The primary contributors to oven spring and top browning are radiation (heat from the oven’s heat source) and convection (hot air circulating in the baking chamber), rather than conduction (direct heat transfer from the surface).
Comparison of Baking Surface Materials
Now that we understand the properties of hearth materials, let’s explore how these translate into actual performance for each type of surface.
In the following sections, we’ll discuss the most popular or common baking surfaces, their properties, and their ideal uses for various applications.
The thermal properties of a material can vary based on its specific composition and temperature range (for example, heat capacity might differ between 100°C and 500°C). While the data provided below may not be 100% precise, the standard deviation is minimal, making it reliable for comparing different surfaces.
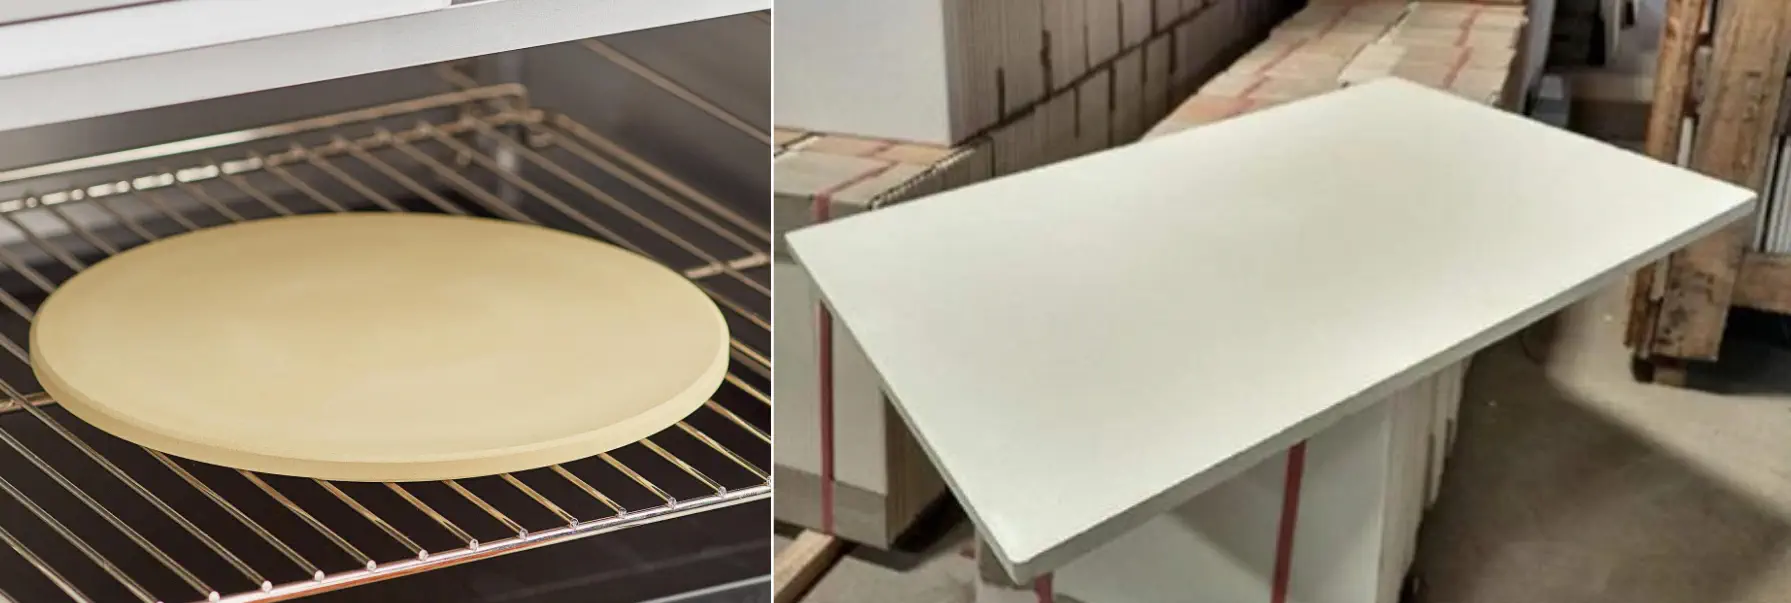
Cordierite (The Standard Pizza Stone)
Heat Capacity: 0.9 J/(g⋅°C)
Density: 2.0-2.3 g/cc
Heat Storage Capacity: 1.8-2.1
Conductivity: 2.5-3.0 W/mK
Cordierite Stone: General Background
The cordierite mineral is the most common material used for making pizza stones. Cordierite stone is what we typically refer to as a “pizza stone”.
In practice, the vast majority of pizza stones available for home use are made of cordierite. Most gas and wood-fired pizza ovens designed for home use, such as Ooni and Gozney, also feature cordierite as the default deck or oven floor material.
There is often confusion between chamotte stone or fire brick and cordierite in the context of hearth materials, specifically pizza stones. As mentioned, cordierite is the most common material for pizza stones and decks for home use, rather than chamotte or fire brick. Chamotte is a different stone with distinct thermal properties, used for different baking applications, and is usually more expensive. You can read more about chamotte stone in the next section.
Cordierite stone is a refractory (fireproof) ceramic, meaning it can withstand very high temperatures, making it suitable for use in an oven for baking purposes. While cordierite itself is a mineral, the stone as a finished baking product is classified as a “ceramic” stone.
The primary component used to produce cordierite stone is the mineral cordierite, which consists of oxides of silicon, magnesium, and aluminum (silica, magnesia, and alumina). In most cases, the cordierite found in pizza stones is synthetic, rather than natural, as it is the result of an artificial mixing of the above oxides, rather than being mined from nature.
High-quality cordierite stones will have a higher content of the cordierite mineral, providing superior heat capacity, distribution, and conduction capabilities. Cheaper stones, on the other hand, will contain less cordierite and more filler materials – such as clay, minerals, and/or other chemical compounds with inferior thermal properties – to reduce production costs.
The production process for cordierite involves grinding and mixing silicon, magnesium, and aluminum oxides, shaping the mixture into the desired form (for hearth materials, either round or square), completely drying it, and finally firing it in a kiln at temperatures between 1,200 and 1,400 degrees Celsius (2,200 to 2,500 degrees Fahrenheit) to create a strong and durable material.
Unfortunately, the quality of the stone cannot be accurately assessed before purchasing unless the manufacturer provides its material composition – a practice that is not very common. However, even a “cheap” cordierite stone can perform adequately and will yield much better results compared to baking without any surface or on an inverted baking sheet (an illustration of this will be provided later).
In terms of appearance, cordierite stone typically has a light color, usually in shades of beige or light gray. Its texture is uniform and almost completely smooth (see picture above).
Cordierite Stone: Performance and Best Uses
Among pizza stones, cordierite offers the highest conductivity (between 2.5-3 W/mK). It is 2-4 times more conductive than chamotte or fire brick, and 6-8 times more conductive than Biscotto.
Cordierite’s conductivity makes it the best stone choice for home ovens (though not as ideal as steel), and for baking non-Neapolitan pizzas in wood-fired or pizza ovens.
To achieve the best baking results with cordierite, it’s highly recommended to use a stone that is at least 1.5 cm (0.6 inches) thick, with 2 cm (0.8 inches) or more being the ideal thickness. This applies to both home ovens and pizza ovens. While a thinner stone can be used, you’ll notice a significant difference in performance.
When baking in a home oven, if possible, choose a rectangular cordierite stone over a round one. A rectangular stone provides more space, offering easier pizza transfers and better overall maneuverability in the oven.
Cleaning and Maintaining Cordierite Stone
Maintaining cordierite stone is straightforward, similar to other baking stones:
- After baking, let the stone cool completely. Once it’s cool, use a brush or metal scraper to scrape off food residue, ensuring the surface is clean and smooth.
- If you’re using the stone in a wood-fired or pizza oven, you can set the oven or burner to full power for about 30 minutes to burn off food residue. This process reduces residue to ash, which can be easily cleaned or scraped off once the stone has cooled completely. Additionally, this method may help restore the stone’s original color by removing light stains.
- There’s no need to wet the stone. Black or brown stains are common and purely cosmetic; they won’t affect the baking performance.
- Due to the stone’s porous nature, never clean it with any cleaning agents. These substances can be absorbed by the stone and released into your food during future use.
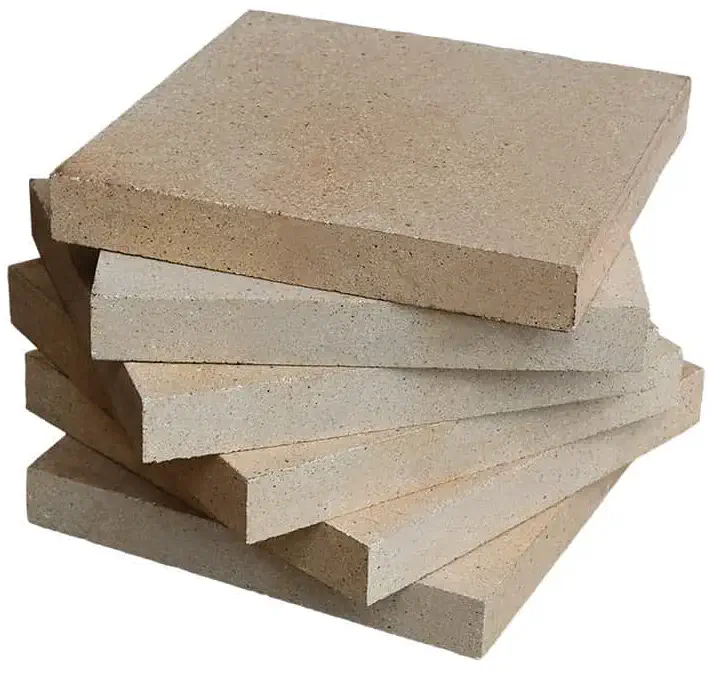
Chamotte and Refractory Fire Brick
Heat Capacity: 0.7-0.9 J/(g⋅°C)
Density: 2.2-2.5 g/cc
Heat Storage Capacity: 1.55-2.25
Conductivity: 0.8-1.7 W/mK
Chamotte Stone / Fire Brick: General Background
Chamotte and fire bricks, while not identical, share similar compositions, thermal properties, and uses. For simplicity, this section will refer to “chamotte,” but it applies to both chamotte and fire bricks.
Both chamotte and fire bricks are artificial, heat-resistant ceramic materials made from clay that contains high percentages of alumina, silica, and other minerals.
The production of chamotte begins with grinding, cleaning, and drying natural clay rich in appropriate minerals, such as vermiculite. This mixture is then shaped into the desired form and fired at very high temperatures (over 2,000°C/3,600°F). Fire bricks are produced in a similar process but may include additional materials or formulations, depending on their intended use. The result is a ceramic surface with exceptional heat resistance.
In terms of appearance, chamotte typically has a white to creamy color with a rough, porous surface. Fire bricks can vary in color and texture, but are often denser and may have a smoother surface compared to some types of chamotte.
Chammote Stone: Performance and Best Uses
Chamotte stone has a heat storage capacity similar to cordierite, but significantly lower conductivity – chammote is 2-4 times less conductive than cordierite.
For this reason, chamotte stone is not ideal for baking pizza in a home oven. However, when baking authentic Neapolitan pizza in a wood-fired oven, chamotte stone offers performance that is the closest to that of biscotto stone (which will be discussed in the next section).
To achieve optimal results, it is recommended to use a chamotte stone that is at least 1.5 (0.6 inches) cm thick, with 2 cm (0.8 inches) or more being ideal.
Cleaning and Maintaining Chammote Stone
Maintaining chammote stone is straightforward, similar to other baking stones:
- After baking, let the stone cool completely. Once it’s cool, use a brush or metal scraper to scrape off food residue, ensuring the surface is clean and smooth.
- If you’re using the stone in a wood-fired or pizza oven, you can set the oven or burner to full power for about 30 minutes to burn off food residue. This process reduces residue to ash, which can be easily cleaned or scraped off once the stone has cooled completely. Additionally, this method may help restore the stone’s original color by removing light stains.
- There’s no need to wet the stone. Black or brown stains are common and purely cosmetic; they won’t affect the baking performance.
- Due to the stone’s porous nature, never clean it with any cleaning agents. These substances can be absorbed by the stone and released into your food during future use.
Biscotto: The Neapolitan High-Heat Specialist

Heat Capacity: 0.7-1.2 J/(g⋅°C)
Density: 1.5 g/cc
Heat Storage Capacity: 1.05-1.8
Conductivity: 0.3-0.4 W/mK
Biscotto Stone: General Background
Biscotto stone is another type of refractory ceramic stone, made from a combination of unique volcanic clay and volcanic ash found in various regions of Italy, particularly around Naples. The composition of this volcanic clay gives biscotto stone its distinct thermal properties, notably its very low conductivity.
Biscotto stone is considered the ideal surface for baking authentic Neapolitan pizzas, and is the material used as the oven floor of most, if not all, pizzerias in Naples.
Biscotto’s low conductivity plays a key role in producing the signature characteristics of authentic Neapolitan pizza. At the high temperatures typically used in Neapolitan ovens (around 500°C/900°F, with the floor temperature reaching approximately 430°C/800°F), stones with higher conductivity can result in an overbaked or even burnt pizza base, even with a short bake time.
Biscotto stone, however, allows for high-temperature baking, enabling the top of the pizza to cook quickly, while the bottom bakes more slowly. This balance creates the signature Neapolitan pizza: a golden-brown, leopard-spotted crust on top, and a soft, slightly charred base that remains floppy and completely soft and tender.
The manufacturing process of biscotto stone is similar to that of cordierite and chamotte stones. It involves mixing natural raw materials, shaping them into the desired form, heating them to very high temperatures, and then cooling and drying them.
In terms of appearance, biscotto stone resembles terracotta, with a clay-red hue and a relatively rough texture. Its surface is smooth yet uneven, contributing to its distinctive look.
Biscotto Stone: Performance and Best Uses
The heat retention capacity of biscotto is similar to that of chamotte and cordierite, and it is not “exceptional” in this regard. What makes biscotto stone unique is its very low conductivity compared to other baking surfaces – specifically, its conductivity is 2-4 times lower than that of chamotte, and 6-8 times lower than that of cordierite.
For this reason, biscotto stone is the ultimate choice for baking authentic Neapolitan pizza in a wood-fired oven, which is cooked for no more than 90 seconds at a temperature of about 450°C (850°F). However, biscotto is far from ideal for baking at lower temperatures, because it is not conductive enough to properly bake the bottom of the pizza.
If your goal is to bake a non-Neapolitan pizza (with baking times of two minutes or more), or to achieve a crispy bottom – a biscotto stone will not be beneficial; in fact, it is often the opposite of what you want due to its low conductivity.
In short, biscotto stone is intended solely for baking authentic Neapolitan pizza.
As mentioned at the beginning of this article, conductivity also affects the preheating time of the surface. For a biscotto stone, this means that a longer heating time will be required compared to other stones (the exact duration depends on the size and thickness of the stone).
Again, it is recommended to use a biscotto stone that is at least 2 cm (0.8 inches) thick. However, since this is a “professional” stone, you are unlikely to find a biscotto stone thinner than this.
Cleaning and Maintaining Biscotto Stone
Maintaining biscotto stone is straightforward, similar to other baking stones:
- After baking, let the stone cool completely. Once it’s cool, use a brush or metal scraper to scrape off food residue, ensuring the surface is clean and smooth.
- If you’re using the stone in a wood-fired or pizza oven, you can set the oven or burner to full power for about 30 minutes to burn off food residue. This process reduces residue to ash, which can be easily cleaned or scraped off once the stone has cooled completely. Additionally, this method may help restore the stone’s original color by removing light stains.
- There’s no need to wet the stone. Black or brown stains are common and purely cosmetic; they won’t affect the baking performance.
- Due to the stone’s porous nature, never clean it with any cleaning agents. These substances can be absorbed by the stone and released into your food during future use.
It is important to note that biscotto stones, especially Biscotto di Sorrento, are “delicate” stones. It is best to avoid applying excessive physical pressure to them; for example, avoid aggressively “banging” the peel on the stone. In general, biscotto stones should be handled gently; otherwise, they may become damaged, which can shorten their lifespan over time.
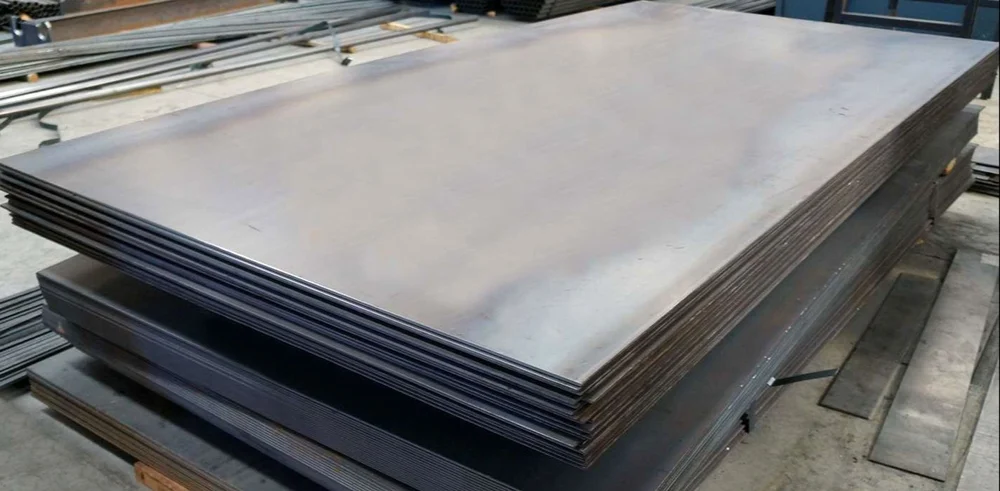
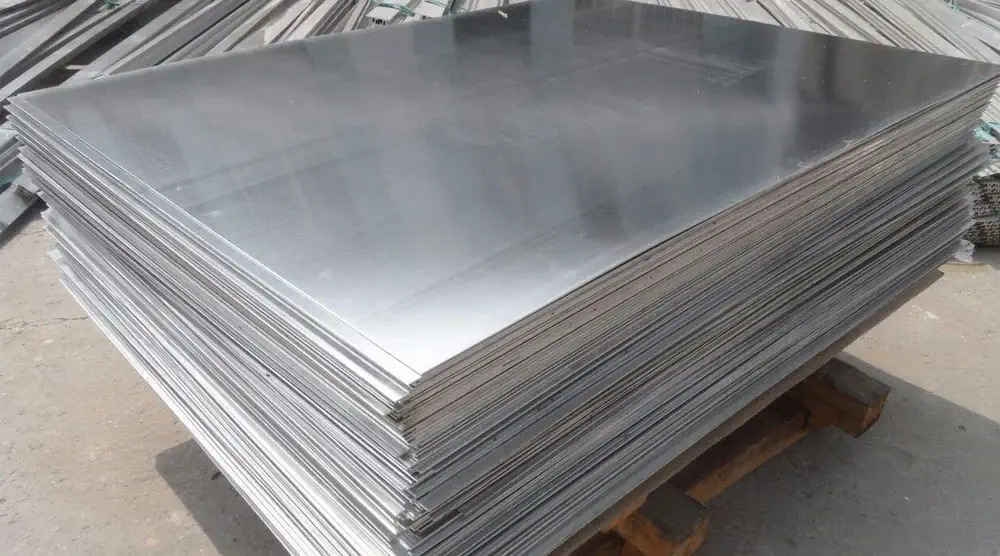
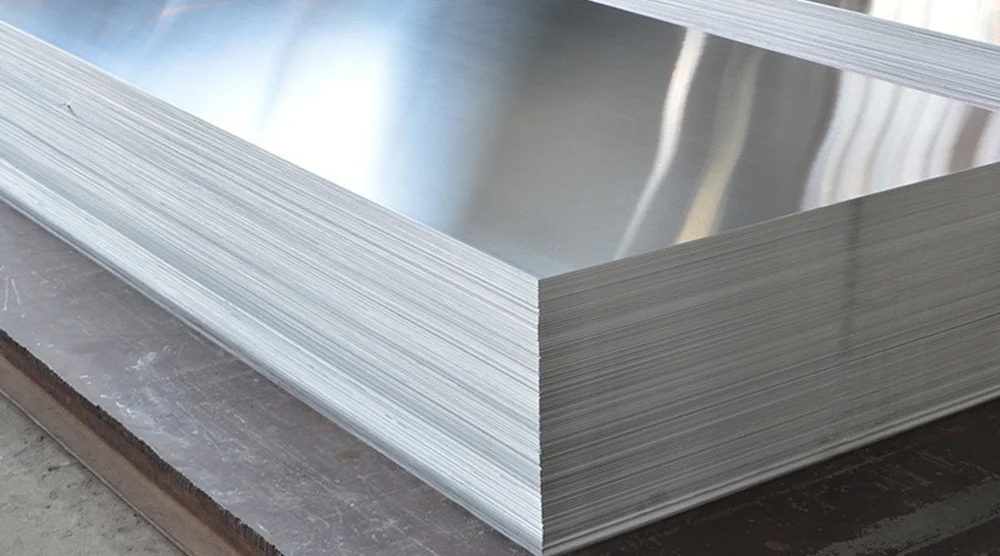
Baking Steel: High-Performance Conduction for Home Ovens
Heat Capacity: 0.46 J/(g⋅°C)
Density: 7.85 g/cc
Heat Storage Capacity: 3.61
Conductivity: 45-55 W/mK
Baking Steel: General Background
A baking steel is often considered the ultimate baking surface for making pizza in a home oven. This is primarily due to its high conductivity, which helps achieve a perfectly browned and crispy bottom, comparable to those found in elite pizzerias with ovens costing tens of thousands of dollars. If you want to make a New York-style pizza (or others) in a home oven, a good baking steel is key.
However, there are two main disadvantages to using a baking steel:
- Weight: Due to the high density of steel compared to a pizza stone, a thick and large steel surface can be very heavy (at least 8 kg / 18 lbs).
- Maintenance: Steel may require maintenance to prevent rust formation.
In general, steel surfaces are perfectly safe for food use, as long as they are not galvanized. It is strictly forbidden to use a galvanized surface for baking or cooking food. The zinc coating applied during the galvanizing process may evaporate at high temperatures, releasing toxic fumes into the baking chamber.
The most common steel used as a baking surface is low-carbon steel or ‘mild steel’. This is due to its high conductivity compared to other types of steel, as well as its wide availability and low price.
Common low-carbon steels used as pizza steels (or baking surfaces in general) include:
- A36 (US)
- ST37 (Germany)
- S235JR or S275JR (Europe)
- 43A (UK)
- 44W (Canada)
- IS 2062 (India)
Steel, along with aluminum (which we will discuss later), is one of the two most common materials for making pizza pans. Both materials perform well, each with its own advantages and drawbacks; the choice between them ultimately comes down to personal preference. Everything stated in this section also applies to pizza pans made of steel.
Pizza Steel: Performance and Best Uses
Steel has an excellent heat storage capacity due to its high density, making it 1.5 to 2 times more efficient at storing heat than pizza stones. However, what truly sets steel apart for home oven baking is its exceptional thermal conductivity.
Steel is approximately 50 times more conductive than pizza stones, and 2 to 3 times more conductive than stainless steel. For home oven baking, steel is the only surface that can achieve a browned and crispy bottom comparable to those found in top pizzerias, without reaching long baking times of 10 minutes or more, which can negatively affect the texture of the crust.
Therefore, if your goal is a well-browned and crispy undercarriage, a pizza steel is the ultimate baking surface choice.
The minimum recommended thickness of steel for baking pizzas is at least 0.8 cm (0.3 inches), with the ideal thickness being between 1 and 1.2 cm (0.4 to 0.5 inches). Anything thinner than 0.8 cm might not allow the surface to store enough heat to fully utilize the steel’s capabilities.
An important consideration when using steel for baking is its weight. As mentioned, steel is significantly denser than pizza stones – approximately four times denser – making it much heavier. The high weight of steel can make it inconvenient to move to and from the oven; it is a flat, large, and heavy surface with no easy way to handle it.
A steel surface measuring 40×40 cm (16×16 inches) and 0.8 cm (0.3″) thick will weigh about 10 kg (22 lbs).
In terms of preheating and recovery times, the high conductivity of steel enables it to heat up much faster than pizza stones. With conductivity about 40 times higher, in a hypothetical scenario where all variables are equal, steel will heat up 40 times faster than stones. This also means steel can recover and regain heat much more quickly between bakes.
Dark or black steel bakes better than shiny or bright steel because a darker surface is more emissive, meaning it radiates heat more efficiently. If your steel surface is shiny from cleaning, it’s best to darken it, which will naturally occur after a few bakes. Alternatively, you can “bake” or season the steel in the oven.
Baking steel is also excellent for baking bread, and almost all types of baked goods. The only exception is delicate pastries that do not necessarily require significant browning, such as croissants.
Steel can also be used for baking or cooking foods other than pizza. For example, you can place pots or trays directly on the steel. However, keep in mind that steel may transfer more heat than desired to the bottom of the dish, which might not be ideal for all applications. To mitigate this, you can place the food on a rack above the steel, which will allow the steel to act as a bottom heating element, radiating heat from below. You can also simply remove the steel from the oven when not needed.
Now, you might be wondering, “If steel is such an excellent baking surface, why isn’t it used in professional pizza ovens or wood-fired ovens?”
The answer is simple: at the high temperatures of a wood-fired oven, there is no reason to use a steel deck. Steel’s high conductivity would transfer too much heat to the bottom of the pizza, potentially burning it in less than a minute. Biscotto stone, designed for authentic Neapolitan pizza, is the opposite of steel, having very low conductivity.
In professional pizza ovens (deck ovens), steel is unnecessary because these ovens have powerful heating elements beneath the stone, ensuring it remains fully saturated with heat. In contrast, a baking surface in a home oven loses heat rapidly when a pizza is placed on it.
To summarize, using a pizza steel in a home oven essentially simulates the baking environment of a professional pizza oven. The high conductivity of the steel “compensates” for the operational limitations of a home oven, allowing it to achieve pizza results comparable to those from top-tier pizzerias.
Baking Steel Cleaning and Maintenance
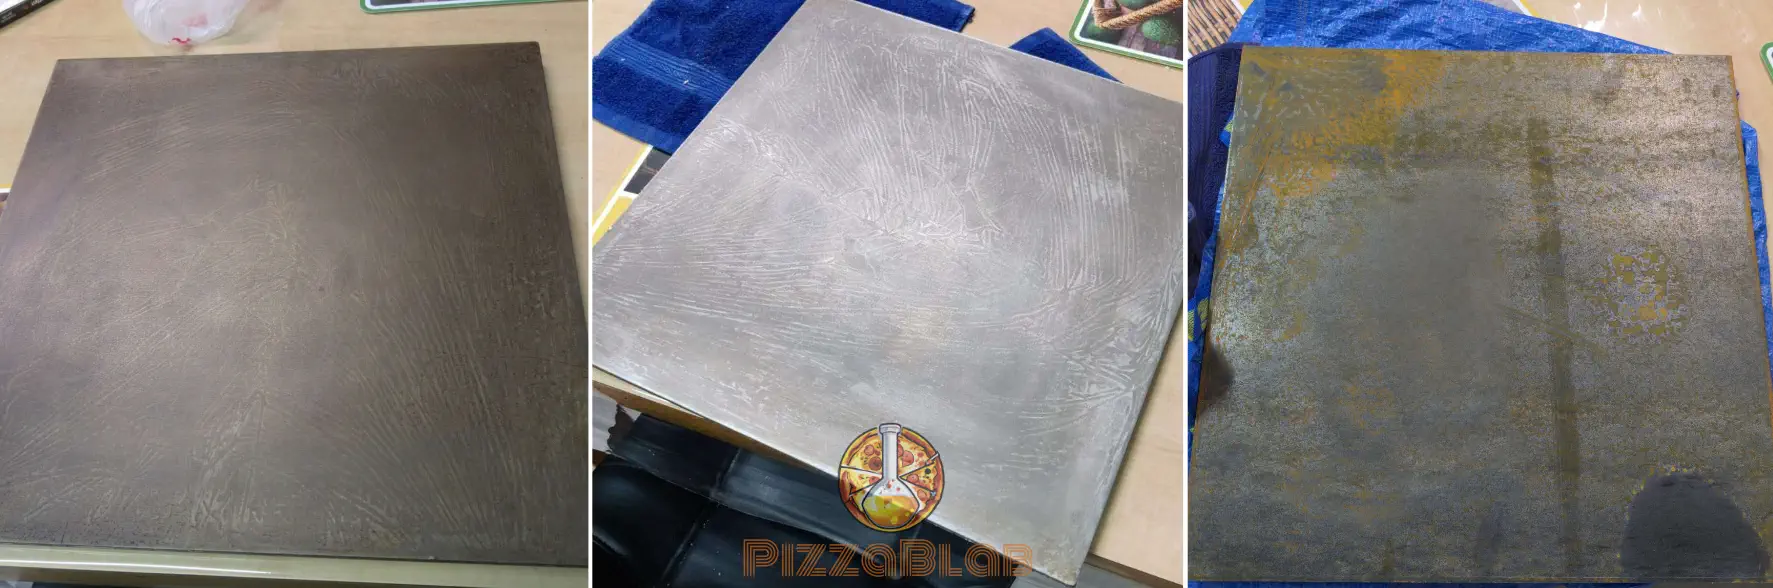
In terms of durability, a baking steel is incredibly robust. It can withstand significant abuse – hitting, scratching, or scrubbing will not damage it (it’s steel, after all). With proper care, it can last a lifetime. To clean food residue from the steel, simply scrape it off with a metal scraper and discard the debris.
The primary maintenance challenge with a steel surface is preventing rust formation.
Since baking steel is bare steel – neither galvanized nor stainless (which contains chromium) – it is prone to rust. Rust forms when the steel is exposed to moisture (water) and oxygen (air), triggering oxidation. This chemical reaction produces iron oxide (rust) on the surface. Once rust begins to form, it can continue to spread if not addressed.
From a food safety perspective, baking on slightly rusty steel poses no significant health risk. However, it’s best to avoid rust formation, as rust can compromise the appearance and integrity of the surface over time.
Seasoning: The Best Defense Against Rust
Seasoning also applies to cast iron bakeware, which shares a similar susceptibility to rust formation. The next section provides detailed instructions for seasoning steel and cast iron.
To prevent rust, it’s crucial to apply a protective coating called “seasoning”. Seasoning involves heating oil on the surface of the steel, causing the oil to decompose and form a thin, polymerized layer. This hydrophobic barrier prevents water and oxygen from reaching the iron in the steel, effectively preventing the oxidation process.
Some baking steels come pre-seasoned and don’t require additional seasoning. However, it’s never a bad idea to apply another layer to “strengthen” the protective coating.
Even with a protective layer, it’s important to reduce conditions that encourage rust. Moisture is the primary culprit, so take precautions after baking and before storing the steel:
- Post-Baking Moisture Release: If you leave the steel in the oven, allow the oven door to remain open for a few minutes after baking. This helps release moisture created during baking.
- Cleaning and Drying: Avoid using water to clean the steel unless absolutely necessary. If you must use water, dry the steel thoroughly and immediately (heating it briefly in the oven can help ensure no moisture remains). Even a single drop left on the steel can lead to rust formation.
Following these practices will help keep your baking steel in excellent condition, ensuring years of rust-free performance. With regular maintenance, your steel can stay rust-free and maintain peak condition for years of reliable use.
A well-applied protective layer not only prevents rust, but also imparts non-stick properties to the surface. This is due to the hydrophobic nature of the layer, which minimizes food adhesion. Over time, this non-stick property improves as the protective layer thickens and strengthens, especially on cast iron pans used to cook fatty foods.
How to Clean Rust from a Steel Surface
If you notice rust starting to form on your steel, follow these steps to remove it:
- Spray vinegar directly onto the rust (5% vinegar, available at any supermarket, works well). To prevent the vinegar from evaporating, you can soak paper towels in vinegar and place them directly on the rust.
- Wait at least an hour for small stains or several hours for larger, stubborn stains. The longer the vinegar works, the more it will break down the rust, making it easier to clean.
- Rub the rust off with a Scotch-Brite pad, metal wool, or sanding paper until no trace of it remains.
- Wipe the surface with a paper towel to ensure it is completely dry and free of rust residue.
- Apply a new seasoning layer. Note that the vinegar will also remove any existing seasoning, breaking it down in the same way it breaks down the rust.
Alternatively, cleaning agents containing phosphoric acid, specifically designed for rust removal, can be used. These agents are safe for metals and effective for cleaning faucets, kettles, and other metal surfaces. They accelerate rust decomposition, allowing for effective scrubbing after a short time (depending on the severity of the rust, this can take between 5 minutes and half an hour).
After using these agents, wash the surface thoroughly with soap and water to remove any residue. Once cleaned, ensure the surface is completely dry before applying a new seasoning layer.
How to Season a Pizza Steel
This section may seem lengthy and complicated, but the process is straightforward and only needs to be done occasionally. As previously mentioned, these instructions are also applicable to cast iron bakeware.
Instructions for Seasoning a Pizza Steel:
1. Prepare the Surface: Ensure the steel is completely clean and dry.
2. Apply a Thin Layer of Oil: Use a high-smoke-point oil, such as canola oil, and spread it evenly across the entire surface – top, bottom, and all sides – ensuring any area exposed to air is covered. The layer should be very thin, and barely visible on the steel.
3. Remove Excess Oil: Since the initial application often uses too much oil, wipe the surface with a paper towel to remove any excess. The surface should have only a slight sheen.
If the steel feels sticky after seasoning, it means too much oil was applied. In this case, re-season it, ensuring you apply only a very thin layer of oil.
4. Bake the Steel: Place the steel in the oven and bake it at 250°C (480°F) for about 45 minutes. This triggers polymerization, causing the oil to bond with the steel and form a protective layer. By the end of the process, the steel will darken, which is a good sign.
The protective layer is now complete! For extra durability, you can repeat the process after the steel has fully cooled, though one application is typically sufficient.
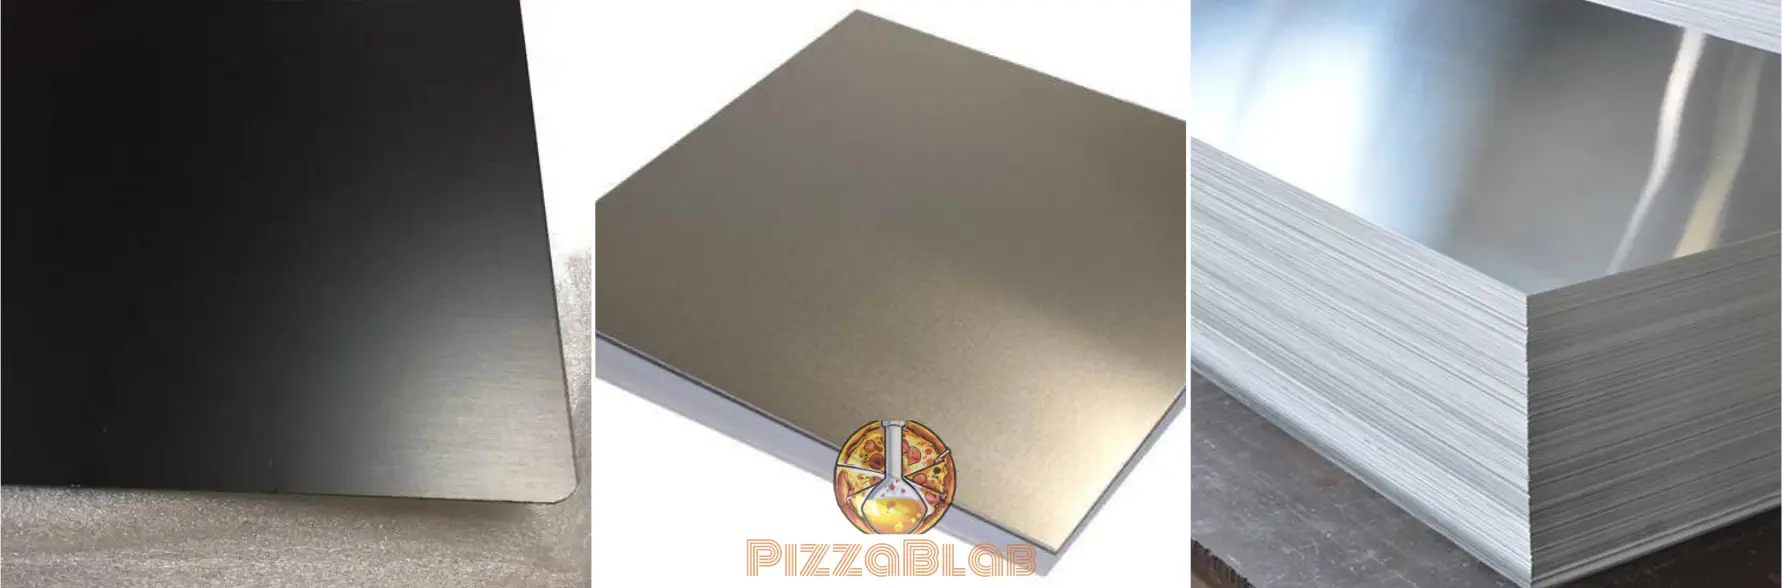
Stainless Steel
Heat Capacity: 0.5 J/(g⋅°C)
Density: 8 g/cc
Heat Storage Capacity: 4
Conductivity: 16 W/mK
Stainless Steel: General Background
Stainless steel, also known as Inox or Nirosta (shortened from the German “nichtrostende Stähle,” meaning “rustproof steel”), has recently gained popularity as a baking surface, primarily due to its high durability, minimal maintenance, and, some would argue, its aesthetics.
The thermal properties mentioned at the beginning of this section refer to 304 stainless steel (SAE 304), the most common type of stainless steel used for kitchenware. If you have encountered a stainless steel baking surface, there is a good chance it is made of 304 stainless steel.
Stainless steel contains a relatively high amount of chromium (at least 10.5%), which provides resistance to corrosion. This makes stainless steel a more expensive material than “plain” steel, especially when it comes to thicker surfaces.
When the chromium in stainless steel comes into contact with oxygen in the air, a chemical reaction occurs on the surface, resulting in the formation of chromium oxide. This creates a protective layer that separates the environment from the metal’s interior. This layer prevents oxygen from reaching the iron within the surface, thereby preventing oxidation and the development of rust.
Stainless Steel: Performance and Best Uses
Stainless steel has a heat storage capacity similar to that of steel and, 2-4 times greater than that of various pizza stones. In terms of conductivity, stainless steel is three times less conductive than steel, but 10-20 times more conductive than pizza stones.
The main “problem” with stainless steel as a baking surface for pizza is its low emissivity.
You can read more about emissivity in the article How Pizza is Baked: Understanding the Thermodynamics of Pizza Baking.
The emissivity of 304 stainless steel ranges from 0.36 for a shiny silver surface (very common), to 0.73 for a dark matte surface (not very common). For comparison, the emissivity of any pizza stone is 0.95, while that of dark steel ranges from 0.95 to 1.00.
A full explanation of how the emissivity of the baking surface affects the pizza bottom can be found in the article linked above. In short, emissivity significantly impacts the baking of the pizza base, particularly in areas that do not come into direct contact with the baking surface. Often, this includes a substantial part of the pizza, as the center “bubbles” and “lifts” off the surface.
The areas of the pizza base that do not contact the baking surface are baked by heat radiated from the surface, rather than through conduction. The more emissive the surface, the more efficiently heat is radiated.
Since stainless steel has low emissivity, baking with it may result in a significant portion of the pizza base not baking ideally. At the end of this article, you’ll find an experiment that illustrates this.
Another disadvantage of stainless steel is its ability to distribute heat. Stainless steel does not excel at evenly distributing heat, resulting in a surface with hot and cold spots, which may lead to uneven baking.
Quality stainless steel cookware often includes aluminum or other metals to improve heat distribution.
In summary, if you are looking for a pizza baking surface – stainless steel is not a good choice.
However, if you seek an “all around” baking surface that can handle various tasks (except pizza), is easy to use, and requires no maintenance, stainless steel is a good option.
Stainless Steel Cleaning and Maintenance
Maintenance is the key advantage of a stainless steel baking surface – it requires almost no upkeep.
After baking, remove food residues by lightly scraping, a straightforward task due to the smoothness of the surface, which facilitates easy cleaning. For a more thorough clean, the surface can also be washed with soap and water.
Beyond that, no special maintenance is required. When used correctly, a high-quality stainless steel surface can last a lifetime.
Aluminum (Baking Surface or Pizza Pan)
Heat Capacity: 0.9 J/(g⋅°C)
Density: 2.7 g/cc
Heat Storage Capacity: 2.43
Conductivity: 210 W/mK
Aluminum: General Background
Aluminum is one of the most widely used materials for cookware and bakeware, and for good reason:
- It is lightweight due to its low density.
- It resists rust.
- It is easy to clean and maintain.
- Its shiny silver appearance is simple to preserve.
- It has high thermal conductivity and ensures even heat distribution.
- It is cost-effective to produce.
For pizza and baking, aluminum is primarily used for pizza pans and general baking pans.
Types of Aluminum Finishes
Aluminum Bakeware Is Available in Three Main Finishes:
1. Bare Aluminum (Non-Finished): Bare aluminum is silver-colored and highly reflective. Its shiny surface results in very low emissivity (less than 0.1), making it unsuitable for baking pizza or any food relying on conductive heat transfer. Bare aluminum cookware is often inexpensive and of lower quality.
Disposable aluminum pans are unsuitable for baking foods that require uniform heat, such as cakes, breads, pies, and pizza, for two key reasons:
1. Insufficient Heat Storage: Their thin structure prevents effective heat retention.
2. Low Heat Absorption: The shiny surface reflects heat from the baking chamber instead of absorbing it, hindering proper heating of the food.
2. Anodized Aluminum: Anodized aluminum undergoes an electrochemical process called anodization, forming a thin, hard layer of aluminum oxide on the surface. This layer enhances resistance to rust and abrasion and also allows for surface coloring.
While still relatively shiny, anodized aluminum is less reflective than bare aluminum.
Anodized aluminum is commonly used for baking pans, including standard baking sheets.
3. Hard Anodized Aluminum: This aluminum undergoes an extended and more intense anodization process, resulting in a surface with a much thicker aluminum oxide layer – up to 10 times thicker than regular anodizing. This enhanced layer provides exceptional resistance to rust, scratches, and food sticking.
The hard anodization process also creates a dark, matte finish, which significantly boosts heat transfer due to higher emissivity.
For pizza and general baking, hard anodized aluminum is the ideal choice, offering excellent durability and superior performance.
Aluminum: Performance and Best Uses
Aluminum has excellent heat transfer capabilities, with conductivity four times higher than that of steel and approximately 150 times higher than pizza stones. Additionally, aluminum excels at even heat distribution.
The heat capacity of aluminum is approximately twice that of steel; however, aluminum’s heat storage capacity per unit volume is about 70% that of steel, due to its much lower density (roughly one-third that of steel). This means aluminum can store only 70% as much heat as steel in the same volume, necessitating an increase in thickness to achieve equivalent heat storage.
The low density of aluminum also makes it significantly lighter than a steel surface of the same thickness and size – its weight is about one-third that of steel with equivalent dimensions.
Therefore, to store the same amount of heat as a steel surface of the same dimensions, an aluminum surface must be approximately 49% thicker. For example, to match the heat storage capacity of steel 1 cm (0.4 inches) thick, the aluminum surface would need to be about 1.5 cm (0.6 inches) thick.
Standard baking sheets that come with most home ovens are typically 0.5–1 mm (0.02–0.04 inches) thick, making them a poor choice for baking pizza. The next section includes an illustration of baking pizza using a standard baking sheet.
To discuss aluminum in the context of baking pizza, we must first distinguish between two factors:
- Its intended use (whether as a baking pan or a baking surface).
- The type of aluminum: bare, anodized, or hard-anodized.
Aluminum as a Baking Surface
Aluminum surfaces specifically designed as deck or hearth surfaces are uncommon. Most aluminum products are available as baking sheets or pans, rather than standalone, flat baking surfaces intended for direct pizza baking. Personally, I have yet to encounter aluminum surfaces cut into flat rounds or squares explicitly designed for this purpose.
In theory, using aluminum as a baking surface could work well for baking pizza in a home oven, provided it is thick enough (at least 1 cm) and hard-anodized. Its high conductivity offers an advantage for baking, and, as a bonus, it is much lighter than steel and requires no maintenance.
That said, aluminum baking surfaces are not commonly found, and hard-anodized aluminum can be expensive. However, if you have access to such a surface, it is definitely worth testing its potential for pizza baking.
Aluminum Pizza Pans
For pizza pans, aluminum, especially hard-anodized, is an excellent choice. It offers lightweight convenience, ease of cleaning and maintenance, and consistently great results for pizzas and other pan-baked goods.
Hard-anodized aluminum (or, at the very least, anodized aluminum) excels as a material for pizza pans due to its high conductivity. Since the pan is not preheated in the oven, aluminum’s conductivity (when not bare and shiny) allows for rapid heat transfer from the oven to the pan and then to the pizza. This is particularly true for hard-anodized aluminum, which absorbs heat most efficiently.
Additionally, high-quality pizza pans made from hard-anodized aluminum are relatively thick (about 0.2 cm), which further enhances their baking performance.
One excellent example of high-quality aluminum pizza pans are those made by Lloyd Pans, known for their exceptional performance in pizza baking (and more). Links to purchase Lloyd pizza pans can be found on PizzaBlab’s recommended products page.
Regarding other types of aluminum – anodized aluminum is a decent option, but not ideal. It should at least be dark in color, not shiny, and not very thin.
Bare aluminum, on the other hand, is not recommended for baking purposes. This is mainly due to its very low emissivity, as well as the fact that bare aluminum is often a cheap product at its core. Consequently, a bare aluminum baking pan will typically be thin and have inferior thermal properties.
Some aluminum pans intended for baking feature an allegedly non-stick coating applied directly to bare or anodized aluminum. However, the non-stick coating on these pans doesn’t last long; in my experience, it often loses its effectiveness after a few bakes or even begins to crumble and peel away from the metal underneath. While these pans can work well for baking (they are usually dark and have a matte finish), their marketing as “non-stick” is often misleading – so don’t rely on them as such.
Aluminum Cleaning and Maintenance
Aluminum is extremely easy to maintain. It does not rust, and anodized or hard-anodized aluminum features a natural non-stick coating that makes cleaning and upkeep straightforward.
Aluminum pans can be cleaned with soap and water. However, it is generally not recommended to put them in the dishwasher, depending on the type and finish of the aluminum. It’s best to verify this with the pan manufacturer or by checking the care instructions that came with the pan
Summary Table: Comparison of Thermal Properties and Ideal Uses
Below is a summary table of the thermal properties and ideal uses of the surfaces discussed in this article:
| Heat Capacity J/(g⋅°C) | Density (g/cc) | Heat Storage Capacity (Heat Capacity * Density) | Conductivity (W/mK) | Key Properties and Ideal Uses | |
|---|---|---|---|---|---|
| Cordierite Stone | 0.9 | 2.0-2.3 | 1.8-2.1 | 2.5-3.0 | High conductivity compared to other pizza stones. Suitable for baking in a home oven (more conductive than chamotte and biscotto, but less than steel), or for baking non-Neapolitan pizzas in a wood-fired oven |
| Chamotte Stone / Fire Brick | 0.7-0.9 | 2.2-2.5 | 1.55-2.25 | 0.8-1.7 | Low conductivity. Suitable for baking authentic Neapolitan pizza in a wood-fired oven or any high-temperature oven |
| Biscotto Stone | 0.7-1.2 | 1.5 | 1.05-1.8 | 0.3-0.4 | Very low conductivity. Ideal for baking authentic Neapolitan pizza in a wood-fired oven or other high-temperature oven |
| Baking Steel | 0.46 | 7.85 | 3.61 | 45-55 | Very high conductivity. Ideal for baking pizzas in a home oven and works great as a pizza pan material |
| Stainless Steel | 0.5 | 8 | 4 | 16 | Not recommended for baking pizza, either as a baking surface or a pan |
| Aluminum | 0.9 | 2.7 | 2.43 | 210 | Ideal material for pizza pans (only when anodized, and preferably hard-anodized) |
Baking Test: Comparing the Effect of Different Baking Surfaces on Pizza
Below is a baking test I conducted to illustrate the real-life differences between the surfaces used for baking pizza. The test includes:
- 1.5 cm (0.6″) cordierite stone
- 0.8 cm (0.315″) steel
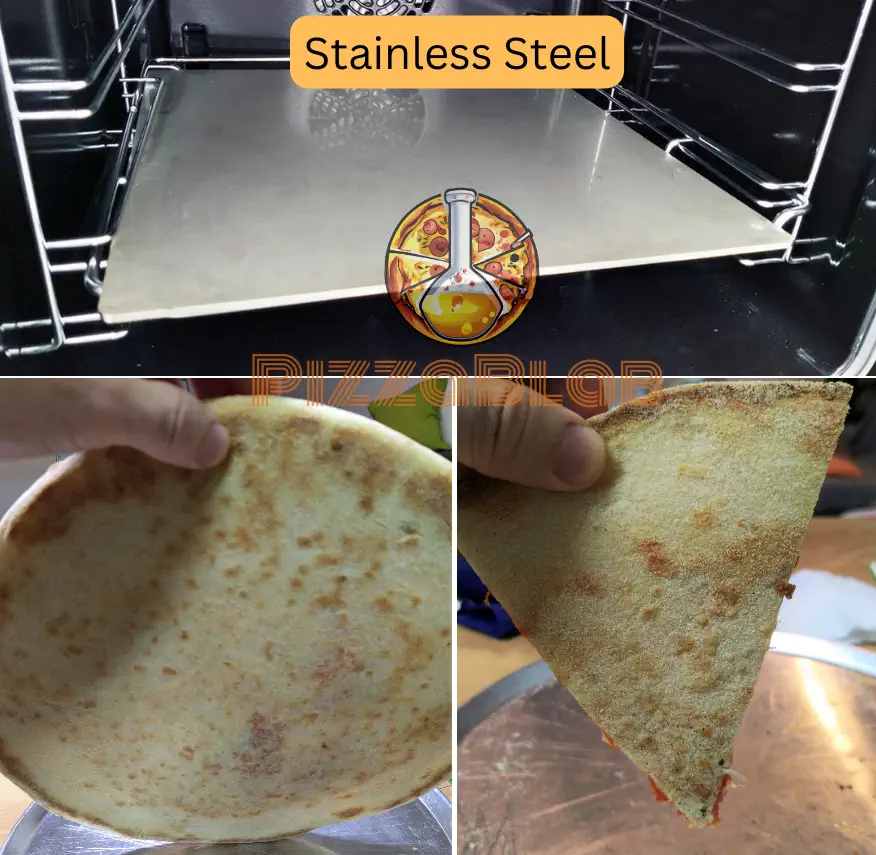
- 0.6 cm (0.24″) stainless steel
- Black anodized baking sheet (standard home oven baking sheet)
The pizzas baked on the steel, cordierite stone, and baking sheet were made from the same dough, divided into three portions. The pizza baked on the stainless steel surface used a separate batch, but followed the same dough formula, fermentation times, and treatment as closely as possible.
Many factors can affect the results of such an experiment. I aimed to minimize these variables in order to create a test that would reliably demonstrate the effects of the different surfaces on baking. While the experiment is not a precise scientific study (especially given the variability in home baking conditions), it effectively highlights the differences between the surfaces. The results align with the details provided in this article, and are consistent with the experiences of other bakers.
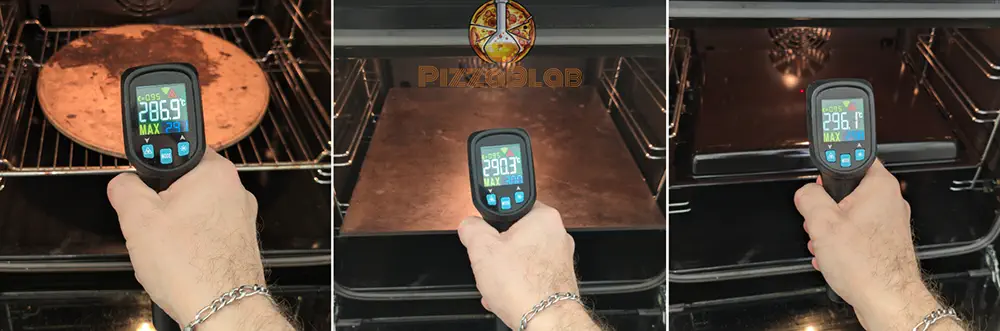
All surfaces were preheated long enough for both the oven and surfaces to reach their operating temperatures. For each surface, I aimed to place the pizzas in the oven at the same temperature (approximately 290°C).
All pizzas were baked until their tops reached the same level of browning, meaning they were removed when the tops achieved the same color, rather than after a set time. In practice, the baking time on the steel was about a minute shorter (approximately 6 minutes) compared to the other surfaces (which took about 7 minutes).
The difference in baking time is expected and makes sense because the heat from the surface passes through the dough to reach the top. This illustrates how the choice of baking surface can influence the baking of the pizza’s top.
Test Results
It’s important to note that these pizzas are relatively small, measuring around 20 cm (8 inches), for the purposes of the experiment. Larger pizzas would require more heat, which could result in a greater and more noticeable difference in the outcomes.
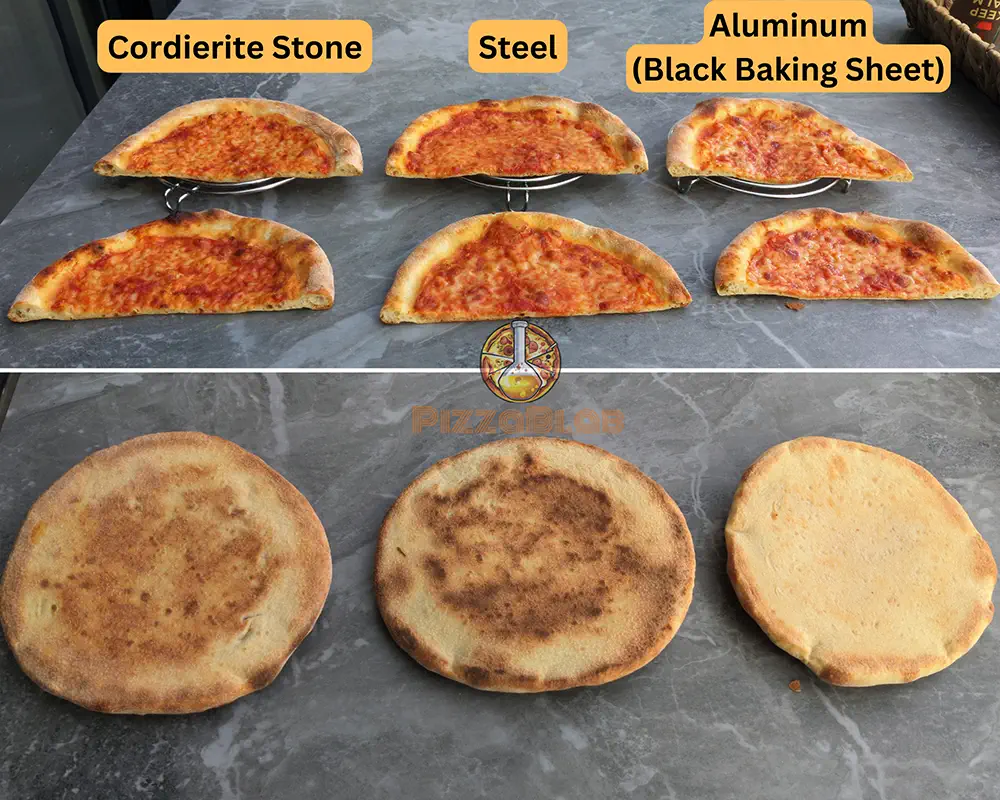
As you can see, the baking surface had a significant impact on the browning of the pizza bottom, but it did not affect the oven spring, the texture, or the crumb structure of the crust.
The baking sheet produced the poorest results, yielding a pale, almost completely white bottom. While the dough was fully baked and edible, it lacked browning, and the bottom was soft with no crispiness, also lacking flavor due to the absence of the Maillard reaction.
The cordierite stone browned the bottom fairly well, while the steel browned and crisped it the best, by a noticeable margin.
The less-browned areas on the bottoms of the pizzas baked on the stone and steel were due to the dough not fully contacting the baking surface. In these areas, there was not enough cheese, and especially sauce, causing it to bubble and rise slightly during baking. As a result, the dough did not maintain continuous contact with the surface, which reduced conductive heat transfer and caused less browning.
Additionally, the perimeter of all the pizzas browned more effectively than the rest of the bottom. This is due to two factors:
1. The crust (cornicione) contains a larger, heavier amount of dough, preventing it from bubbling and rising during baking, ensuring it stays in contact with the surface.
2. Without sauce or cheese to provide a ‘cooling’ effect and moisten the dough, the perimeter heats up and dries faster, resulting in quicker browning.
The stainless steel surface produced poor results as well. The pizza’s bottom was mostly pale, with only a few spots browning. This highlights how surface emissivity impacts baking quality – areas of the pizza that did not maintain continuous contact with the surface did not brown much. Although the dough was pale, it was fully baked and edible, but lacked crispiness.
Of course, it is always possible to leave the pizza in the oven longer to achieve more browning. However, extended baking can lead to overbaking, drying out the dough, sauce, cheese, and toppings, which would negatively impact the final result.
Final Thoughts: Choosing the Best Surface for Your Needs
So, what is the best surface for baking pizza? As with many aspects of pizza making, the answer is: it depends.
The ideal surface depends on the baking conditions (temperature, time, direct surface baking or in a pan), and the desired pizza characteristics (type of pizza, crust texture, etc.).
For achieving a crispy bottom when baking pizzas directly on the surface in a home oven, a pizza steel is the top choice.
Steel’s high conductivity and excellent heat storage capacity make it ideal for transferring heat efficiently to the bottom of the pizza. To get the best results, the steel should be at least 0.8 cm (0.315 inches) thick.
A cordierite stone can also work well for baking in a home oven, though it’s not as effective as steel.
Cordierite is also a solid choice for use as a floor/deck material in a wood-fired or dedicated pizza oven, especially when you’re not aiming for authentic Neapolitan pizza. The stone should be at least 1.5 cm (0.6 inches) thick.
For authentic Neapolitan pizza baked in a wood-fired oven, biscotto stone is the ideal surface, followed by chamotte or fire brick. These materials have low conductivity, which is perfect for the high-temperature, short baking time of Neapolitan pizza.
When baking in a pan, hard-anodized aluminum is the best option, though steel also performs well.
As for stainless steel, while it can work for baking bread and other baked goods, it is not recommended for baking pizza.
Key Takeaways
- Foundational Knowledge:
To fully grasp the physics discussed here, it is highly recommended to read The Science of Pizza Baking: Understanding Heat Transfer & Why It Matters. It explains the core concepts of conduction, convection, and radiation that make these surface choices make sense. - The Role of the Baking Surface:
The surface’s primary job is to store thermal energy and transfer it directly to the dough through conduction. This is what ensures the bottom properly crisps and browns. - Thermal Conductivity:
This is the most important property of a baking surface. It dictates how fast heat is transferred to the dough. High-conductivity materials (like steel) bake the bottom faster, while low-conductivity materials (like biscotto) transfer heat more slowly. - The Conductivity-Temperature Rule:
As a general rule, use a more conductive surface (steel) for lower temperatures (home ovens <300°C/570°F) to maximize available heat. Use a less conductive surface (chamotte/biscotto) for high temperatures (wood-fired >400°C/750°F) to prevent the bottom from burning before the top is done. - Heat Capacity and Thermal Mass:
Thick, dense surfaces act as a thermal battery. While they take longer to preheat, they store more energy and offer faster “recovery times” between pizzas, ensuring the second and third pizzas bake as consistently as the first. - Material Comparison:
- Baking Steel: Best for home ovens (230–290°C). High conductivity for maximum browning.
- Cordierite/Stone: Best for mid-range heat (280–350°C). Balanced and versatile.
- Biscotto: The only choice for extreme heat (400°C+). Low conductivity prevents the bottom from burning in 60–90 seconds.
- Aluminum: Extremely high conductivity but low mass; best suited for specific pan styles rather than as a standalone hearth.
- Minimum Thickness Guidelines:
For effective heat storage, a baking steel should be at least 0.8 cm (0.315″) thick, while a stone surface should be at least 1.5 cm (0.6″) thick. Surfaces thinner than this often lack the energy required for a properly browned, crispy base. - Emissivity and Radiation:
Dark, matte surfaces (like seasoned steel or dark stone) have higher emissivity, meaning they absorb and release radiant heat more efficiently than shiny or reflective surfaces. - Why Not Stainless Steel?
Stainless steel is generally not recommended as a pizza baking surface. It’s typically shiny (very low emissivity), which prevents the bottom from evenly browning. - The Porosity Myth:
Contrary to popular belief, pizza stones do not act like a sponge by “wicking” or absorbing moisture from the dough to make it crispy.
Enjoyed this article? Join the BLAB
Unlock the Key Takeaways above and enjoy a 100% clean, ad-free experience across the entire site.