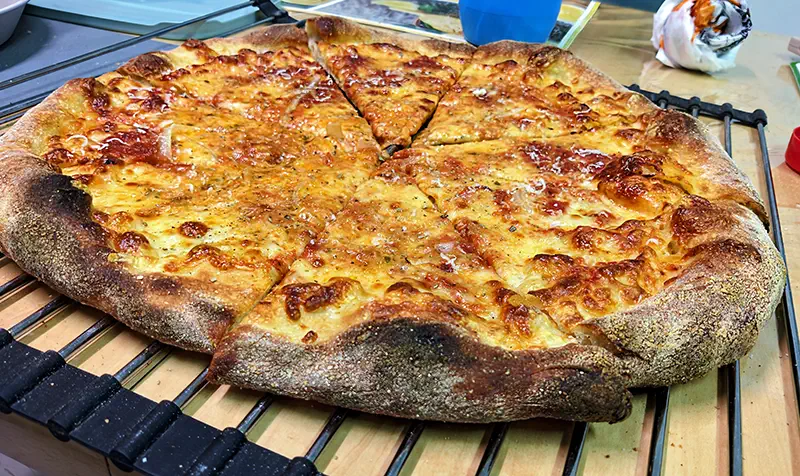
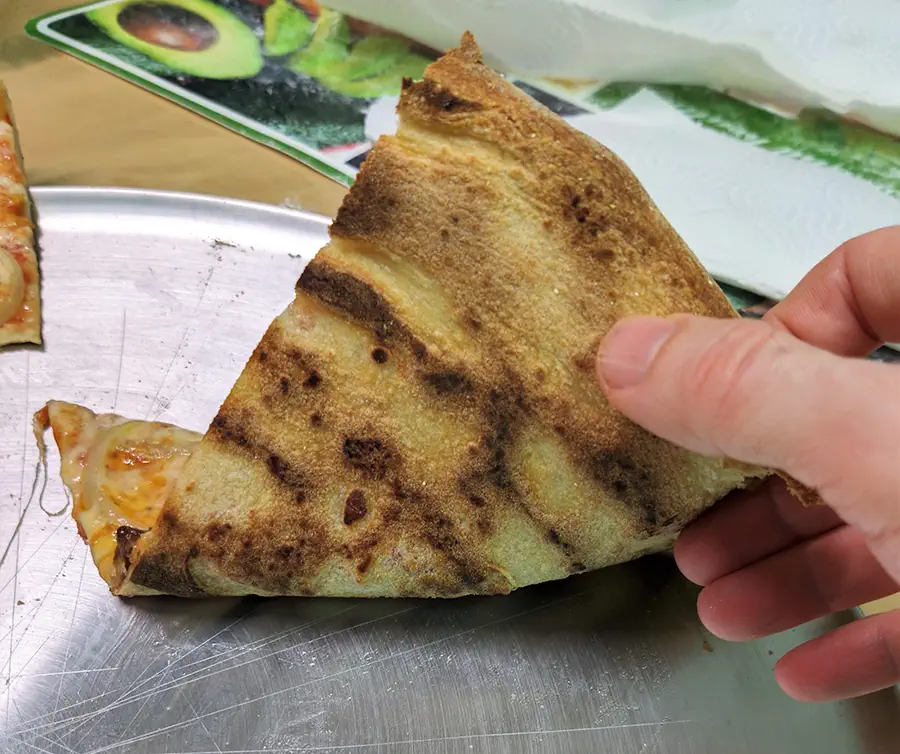
New York Style Pizza Recipe: Authentic NY Pizza for Home Ovens
New York pizza is arguably the best pizza you can make in a home oven. It has everything you could want in a pizza: a thin crust that is both crispy and chewy, with tomato sauce and cheese perfectly melded together, making it truly irresistible. If you’re considering making pizza in a home oven, look no further – this recipe has you covered, guaranteed
If you’re not familiar with NY style pizza yet, now is the perfect time to explore it. In my opinion, it’s the ultimate pizza to make in a home oven. Why? It requires minimal equipment, can be baked at the temperatures typical of a home oven (unlike Neapolitan pizza, which demands baking at high temperature), and most importantly – it’s simply delicious. Once you try it, you might never feel the need to order pizza delivery again.
Even if you’ve never made pizza dough before, this recipe will quickly give you great results. And if you’re experienced, you’ll hopefully discover how to make it even better.


Note: The preparation instructions in the recipe below are intentionally kept general and concise. Pizza making is a process, and the final result depends far more on using the correct technique and following the right process than on any single recipe. That said, this recipe will still guide you to excellent results – even on your first attempt.
For simplicity, the recipe assumes a default fermentation time of 4 hours. Using the dough calculator provided below, you can adjust the recipe for any fermentation time or method (room temperature or cold fermentation).
All measurements are in grams, so a kitchen scale is essential. Baking by eye or using volumetric measurements is not recommended.
Making New York Pizza Dough
Equipment Needed
- A bowl for mixing the dough.
- A kitchen scale for accurately measuring the ingredients
- A precise scale for accurately measuring the amount of yeast (optional but recommended).
- A container for fermenting the dough – this can be a plastic or glass container, a fermentation box, or even a plastic sandwich bag.
Dough Ingredients and Quantities (Pizza Dough Calculator)
Below is PizzaBlab’s pizza dough calculator, featuring a preset recipe formula and quantities for a standard 30cm/12″ pizza, designed for a 4-hour fermentation at 20°C/68°F.
It’s recommended, and even mandatory, to adjust the fermentation time and temperature to match your needs and preferences. This ensures the calculator provides the correct yeast quantity for your dough, which is crucial for achieving optimal fermentation.
You can choose any fermentation duration and method (room temperature or cold fermentation), ranging from 2 hours to long fermentation.
Additionally, you can customize the recipe to suit your preferences – adjusting the dough hydration (between 57% and 65% is recommended), the amount of salt, sugar, or oil, the size and number of pizzas, or using a preferment, among other options.
The calculator is based on baker’s percentages. If you are not familiar with this concept, I highly recommend reading about it in the Encyclopizza, as it’s a crucial yet simple concept that will greatly enhance your baking skills.
For further details on using the calculator, you can also refer to the guide on using PizzaBlab’s dough calculator.
| Ingredient | Grams | Tsp | Tbsp |
|---|---|---|---|
| Flour (100%) | 0 | 0 | 0 |
| Water | 0 | 0 | 0 |
| Salt | 0 | 0 | 0 |
| Yeast | 0 | 0 | 0 |
| Total Dough Weight | 0 | 0 | 0 |
| Single Ball | 0 | 0 | 0 |
| Total Flour and Water (including preferment) | Grams | Tsp | Tbsp |
|---|---|---|---|
| Flour | 0 | 0 | 0 |
| Water | 0 | 0 | 0 |
| Yeast | 0 | 0 | 0 |
| Preferment | Grams | Tsp | Tbsp |
|---|---|---|---|
| Flour in Preferment | 0 | 0 | 0 |
| Water in Preferment | 0 | 0 | 0 |
| Final Dough | Grams | Tsp | Tbsp |
|---|---|---|---|
| Flour (remaining) | 0 | 0 | 0 |
| Water (remaining) | 0 | 0 | 0 |
| Salt | 0 | 0 | 0 |
| Yeast | 0 | 0 | 0 |
| Total Dough Weight | 0 | 0 | 0 |
| Single Ball | 0 | 0 | 0 |
Flour for New York Pizza Dough
Any bread flour or pizza flour will work, and even all-purpose flour may be suitable. However, for the best results, it’s recommended to use flour with a high protein content, ideally 11% and higher.
Using Italian flours for making New York style pizza is not recommended.
For further reading on selecting pizza flour, refer to the following article: The Ultimate Guide to Pizza Flour: Characteristics, Differences, and Choosing the Ideal Flour.
Sugar and Oil in New York Pizza Dough
Oil is added to the recipe to create a softer, more tender crumb. While you can omit it, doing so is not recommended. Any type of oil can be used (EVOO, canola, sunflower etc.).
Sugar is included to promote browning. While it can be left out, it is not recommended to do so.
Mixing & Kneading the Dough
1. Prepare Ingredients: Prepare all the ingredients according to the quantities listed in the calculator.
2. Mix Water, Salt and Sugar: Start by adding the water to a bowl, followed by the salt and sugar. Mix them together until most of the salt and sugar dissolves.
If your recipe includes oil, it’s best to add it only after the flour has fully absorbed the water, as oil can inhibit gluten development. However, it is also possible to add it to the water.
3. Add Flour and Yeast: Add the flour to the bowl and sprinkle the yeast over it. Alternatively, you can dissolve the yeast directly in the water and mix well, which helps distribute it evenly throughout the dough, especially when kneading by hand. It’s ok to add the yeast directly with the salt-water mixture.
If you’re using dry yeast and cold water (below 20°C/70°F), it’s recommended to suspend the yeast in warm water (about 40°C/105°F) for about 10 minutes before adding it to the cold water. Adding dry yeast directly to cold water can damage the yeast cells and impair their ability to ferment the dough.
4. Knead the Dough: Begin kneading the dough. If you plan to ferment it for a short period (up to 3-4 hours), aim to full gluten development by the end of the kneading process (i.e., pass the windowpane test).
The longer the fermentation duration, the less kneading is required. For dough to be fermented for more than 4 hours at room temperature or cold fermented for over 24 hours, knead just until the dough becomes uniform and coherent, with a “creamy” texture (see picture below).
- If kneading by hand (recommended), mix all the dough ingredients in a bowl until the flour absorbs most of the water. Transfer the dough to a work surface and knead for approximately 5 minutes.
- If using a stand mixer, mix all the dough ingredients and run the mixer on the lowest speed (1) for 1-2 minutes, or until the water is absorbed. Then, increase to speed 2 (do not go higher!) and continue kneading for around 10 minutes. Monitor the condition of the dough; it should be relatively smooth and uniform when ready.
- If using a spiral mixer, follow the same process as with the stand mixer, kneading for about 5-10 minutes at low speed, depending on the mixer and the dough amount.
Alternatively, you can use a semi-autolyse: Mix all the dough ingredients just until no dry flour remains, cover to prevent drying, and let rest for 10-20 minutes before kneading/mixing. This can make kneading easier.
5. Final Dough Temperature: It’s recommended to aim for a final dough temperature of 23-27°C/73-80°F. This is regardless of the kneading method used.
6. Stretch and Folds: After kneading, you can do 1-2 series of stretch and folds. Be sure to wait at least 15 minutes after the initial kneading before beginning the first series to allow the gluten to ‘relax’.
Dough Shaping/Balling and Fermentation
1. Divide the Dough Into Dough Balls: Divide the dough into the desired number of pizzas. Weigh each portion of dough instead of relying on visual estimation. If a dough ball is too heavy or too light, adjust by adding or removing dough until it reaches the correct weight.
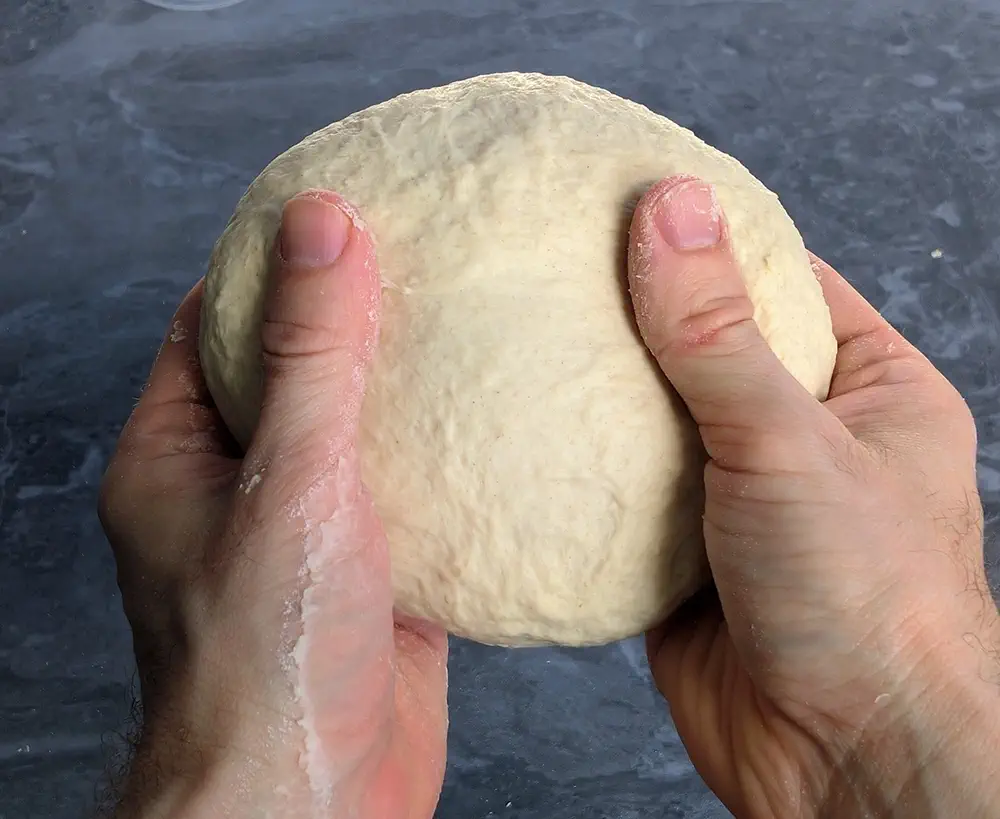
2. Shape and Ball the Dough: To shape each ball, flatten the dough on the work surface with the palm of your hand or fingertips. Fold the edges from the outside toward the center, continuing all the way around until the dough forms a rough sphere.
Flip the dough over so the folded side is underneath, and the smooth side is on top. Place your palm over the dough and roll it in circular motions on the work surface until it forms a round ball with an even surface.
Don’t worry about creating a perfect ball. As long as it’s generally round, it’s fine. There’s no need to tightly “seal” the bottom of the dough ball.
If the dough sticks to the work surface, you can use a small amount of flour to help prevent it from sticking.
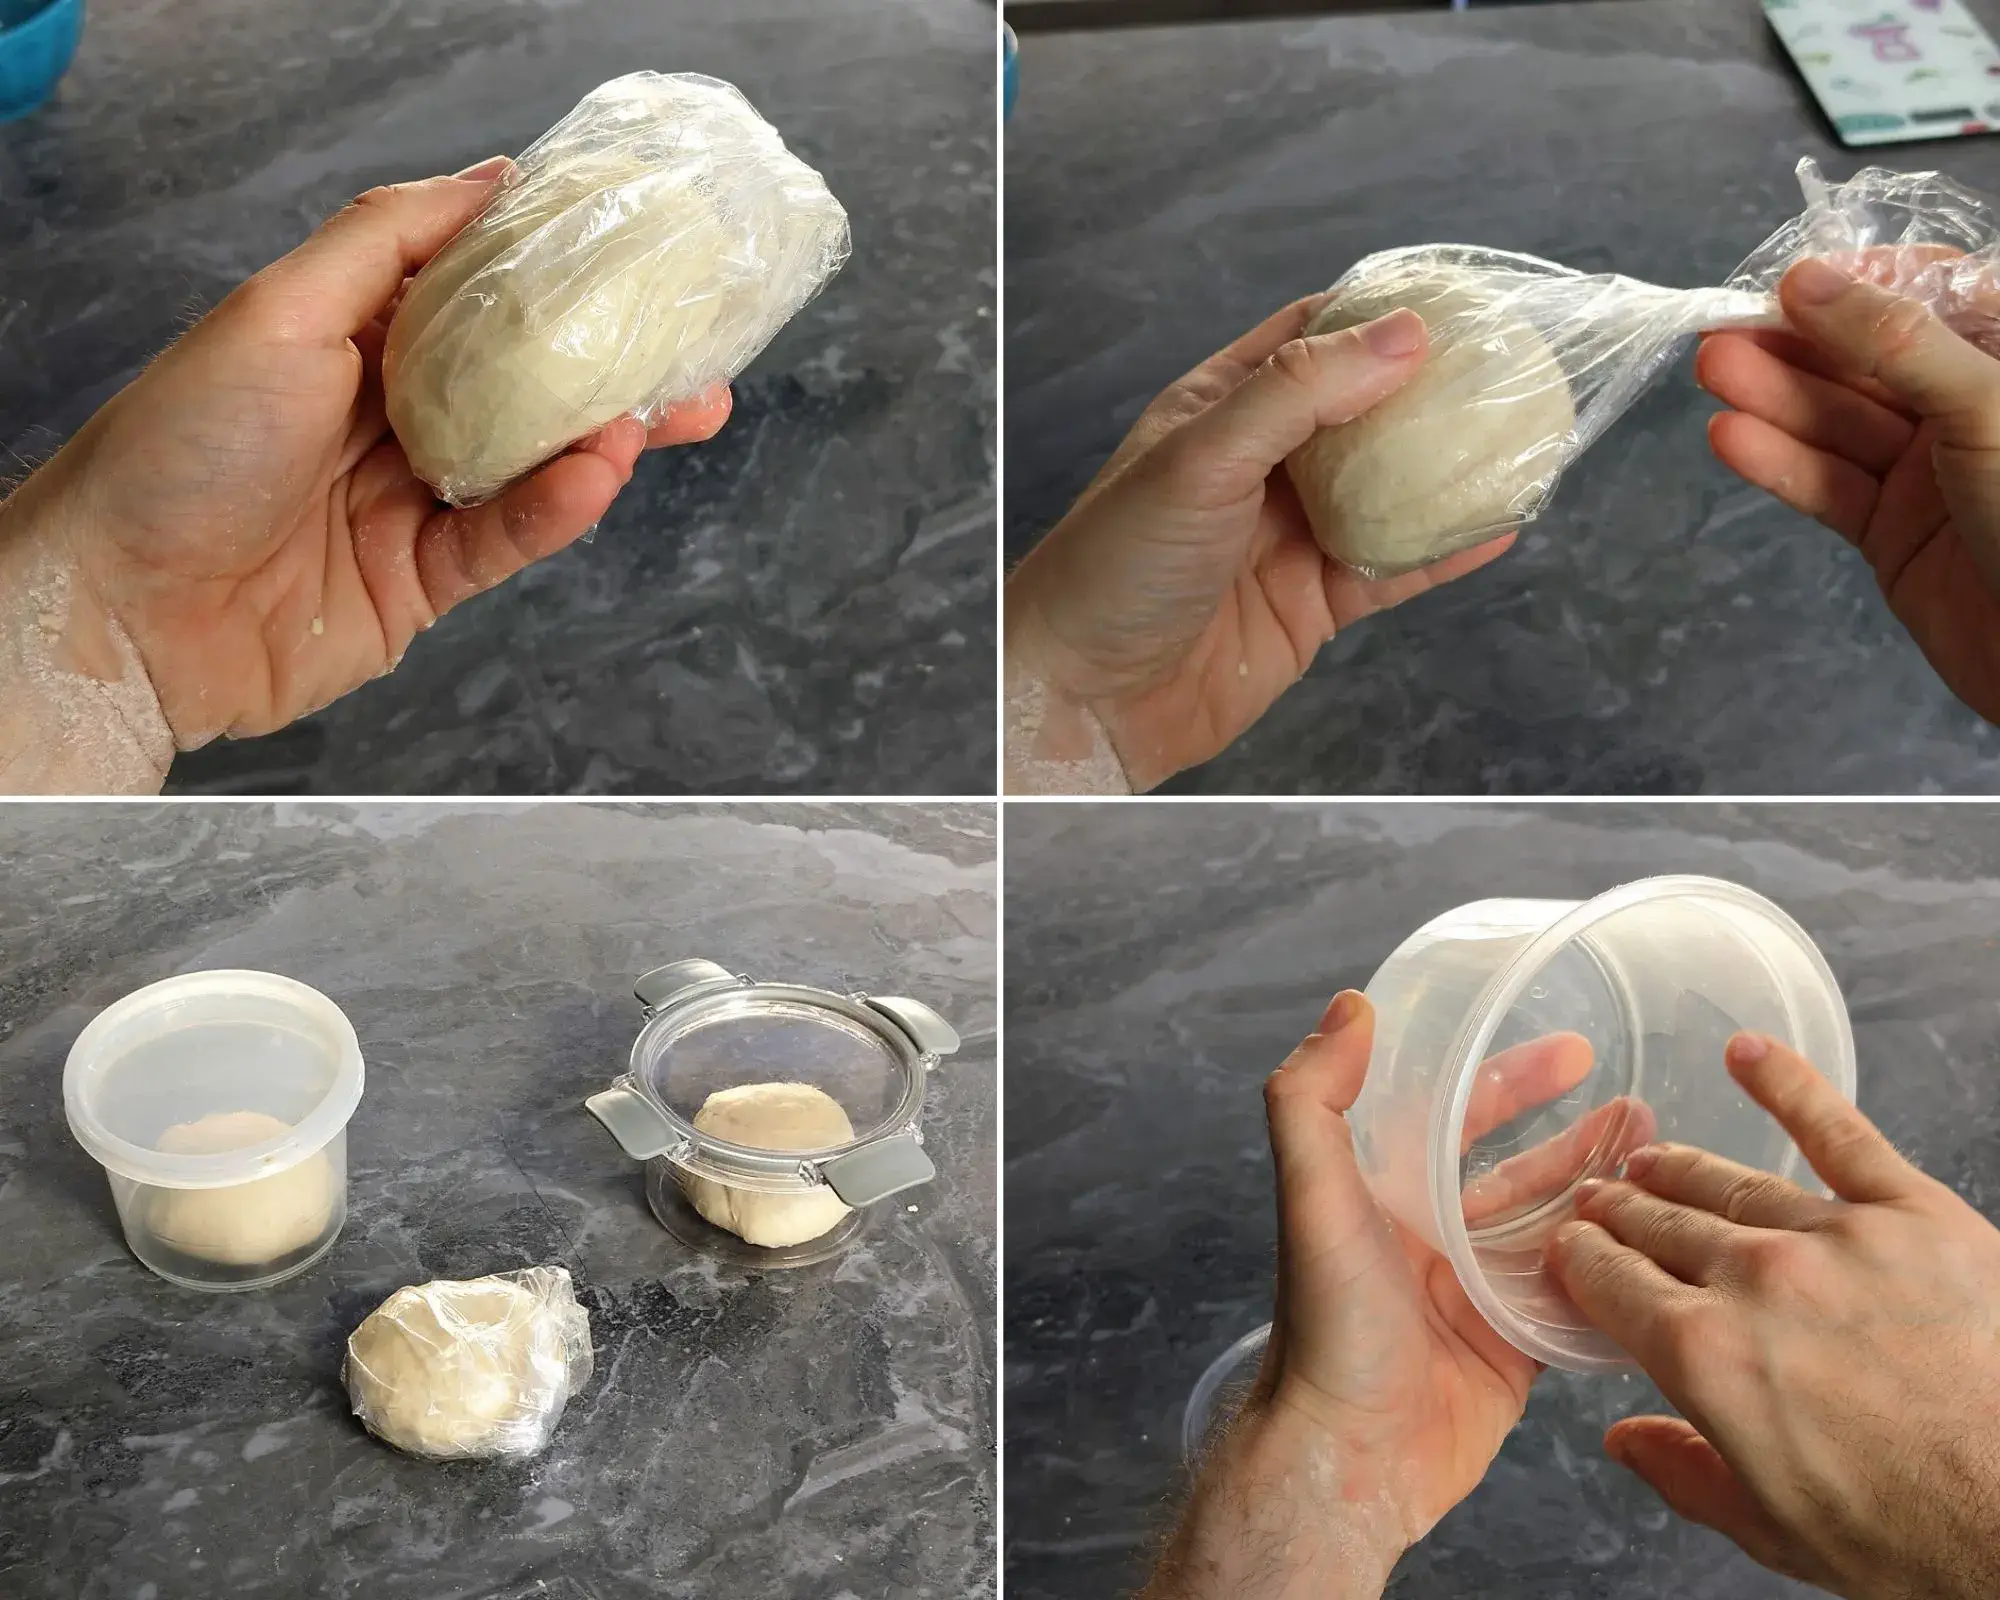
3. Move the Dough to the Fermentation Container(s): Transfer the dough balls to a fermentation container, and cover with a lid or cling wrap to prevent the dough from drying out.
- If fermenting multiple balls in a fermentation box, leave about 5 cm (2″) of space between each dough ball.
- If fermenting individual balls in a plastic or glass container, lightly oil the inside of the container with any type of oil before placing the dough inside. This will facilitate easier removal of the fermented dough ball later.
- If fermenting in a plastic bag, coat the dough ball with oil, place it in the bag, and fold the end of the bag into a “ponytail.” Tuck the ponytail underneath the dough ball.
4. For Room Temperature Fermentation: allow the dough to ferment in the container until it’s ready for baking.
5. For Cold Fermentation: transfer the dough to the fridge immediately after balling.
You can also ferment the dough in bulk and divide it into balls later, approximately 50% into the fermentation process (for example, if the total fermentation time is 6 hours, divide the dough into balls or reball existing dough balls after 3 hours). For more information on bulk and ball fermentation and their effects on the dough, refer to the following article: Ball vs Bulk Fermentation in Pizza Dough: A Complete Guide.
Pre-Baking Preparations
Equipment Needed
- Baking Surface: Pizza stone, baking steel, or an inverted oven tray (the standard black tray that comes with the oven, placed upside down for easier pizza placement and removal).
- Pizza Peel or Large Tray: For transferring the pizza to and from the oven.
- Bowl or Deep Container: For placing and flouring the dough.
- Cooling Rack: Essential for cooling the baked pizza.
- Parchment paper or pizza screen (Optional): This can assist with easier transfer of the pizza to the oven.
Ingredients and Quantities
The amounts listed below are for one standard-sized pizza, approximately 30 cm (12″) in diameter. If you’d like to adjust the quantities of cheese and sauce based on your preferences or different pizza sizes, you can use PizzaBlab’s cheese and sauce calculator.
- 160 Grams (5.6 ounces) of semi-hard cheese (see the following section).
- 100 Grams (3.5 ounces) of canned crushed tomatoes of your choice.
- 0.5 Tsp dried oregano (to taste).
- Parmesan or pecorino cheese (optional but highly recommended).
- Flour (for dusting the dough, the work surface and the pizza peel).
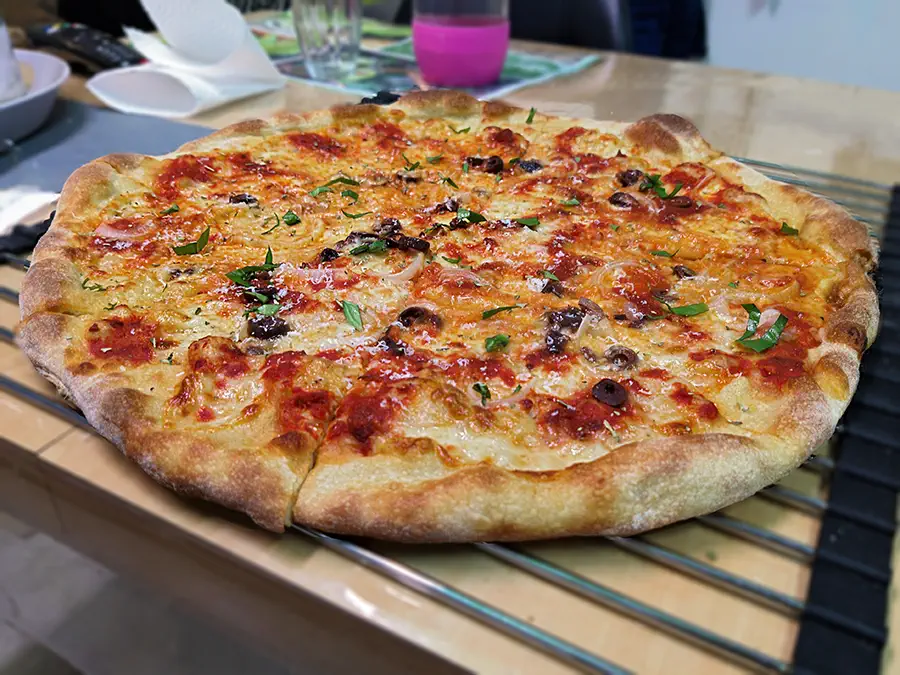
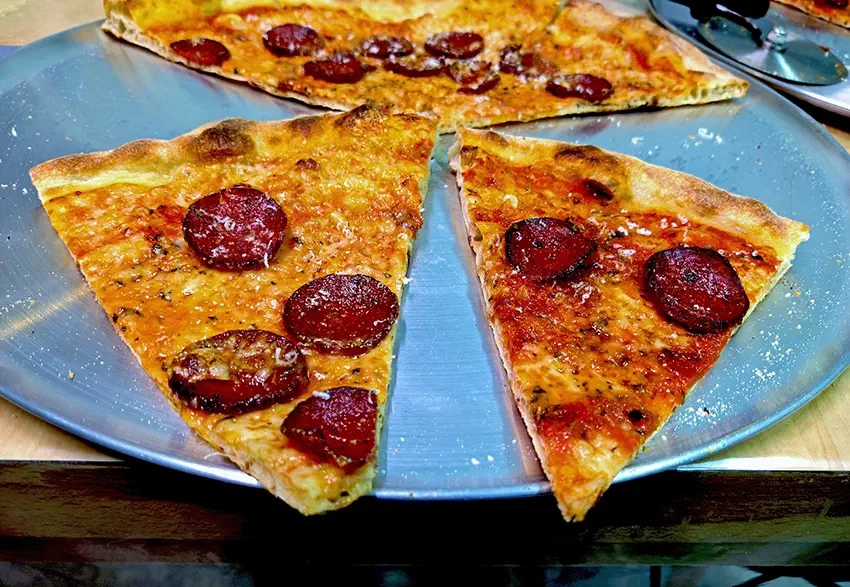
- Toppings of your choice.
Cheese for New York Pizza
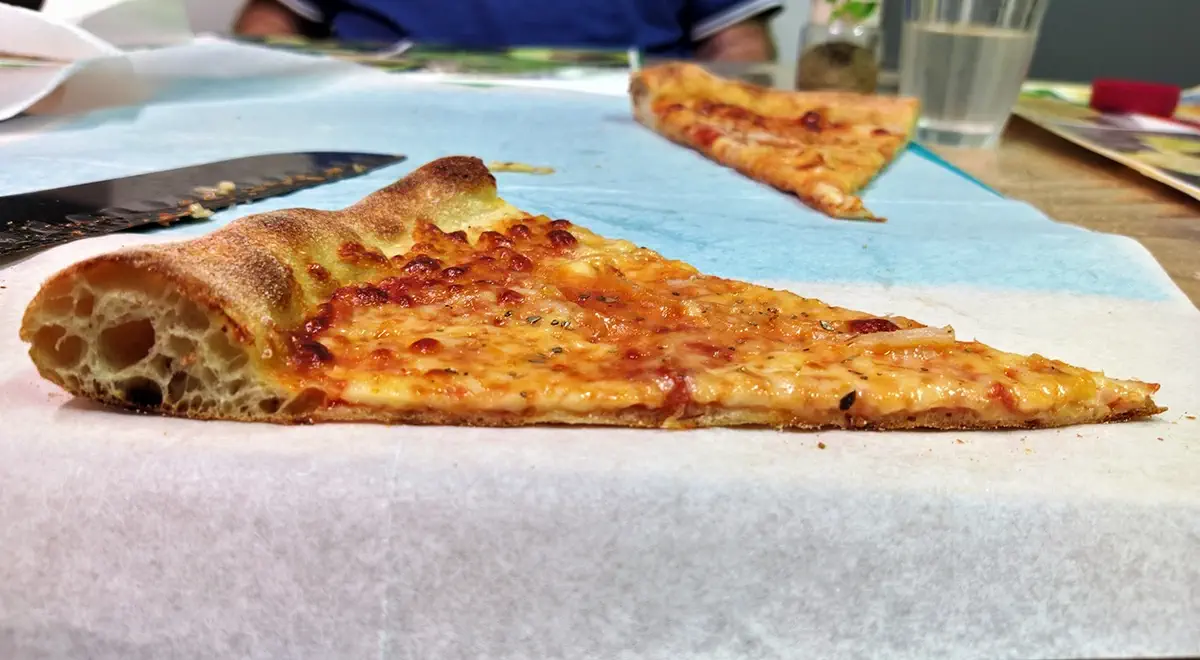
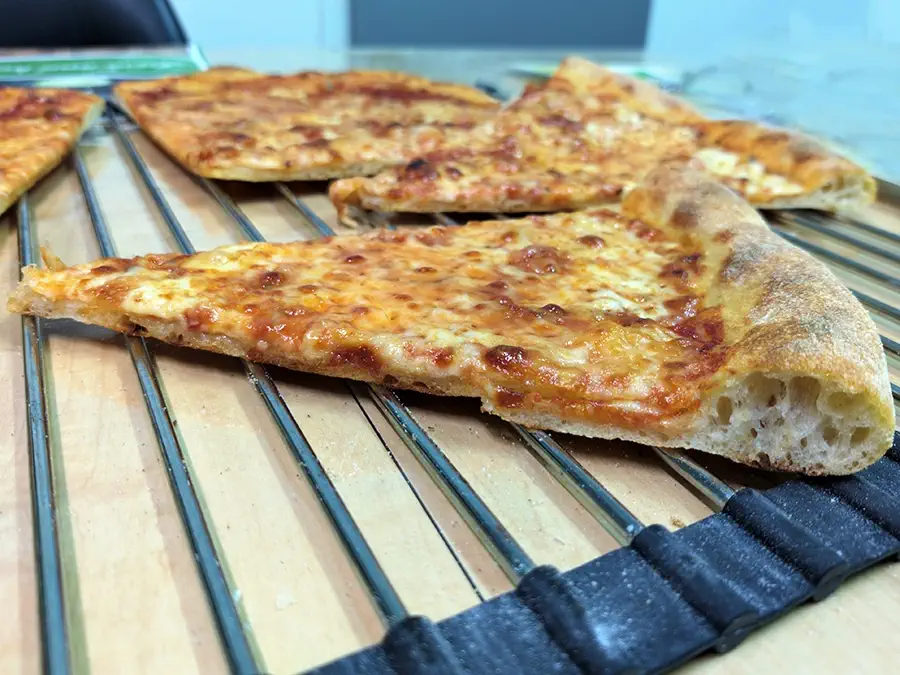
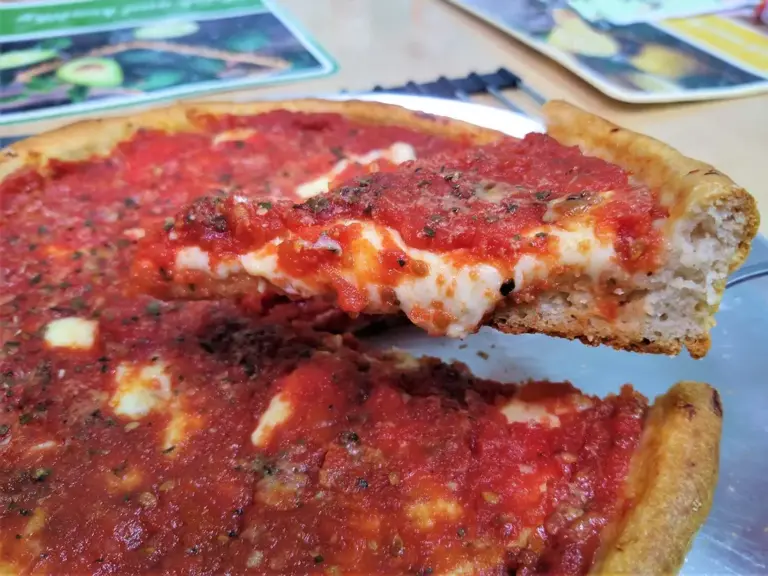
To create the most authentic New York-style pizza, the best choice for cheese is shredded whole milk (22-26% fat), low-moisture (“block”) mozzarella. This type of mozzarella cheese is crucial for achieving the stretchy texture and appearance that New York pizza is famous for, characterized by cheese that fully melds with the sauce and takes on an orange hue.
You can also use sliced mozzarella or cut it into strips or cubes, though this will create a different texture that may be better or worse, depending on your preferences.
It’s best to avoid using fresh mozzarella cheese as the main cheese, as it doesn’t suit this style of pizza as well. However, you can add fresh mozzarella alongside shredded low-moisture mozzarella if desired.
Since mozzarella cheese has a mild flavor, feel free to replace some of it with any semi-hard cheese of your choice, such as Gouda, Emmental, Provolone, or Cheddar. The same considerations about the form of the cheese – grated, cubed, or sliced – apply to these other cheeses.
Additionally, it is highly recommended to grate hard cheeses like Parmesan or Pecorino over the pizza, either before or after baking, as they add significant flavor.
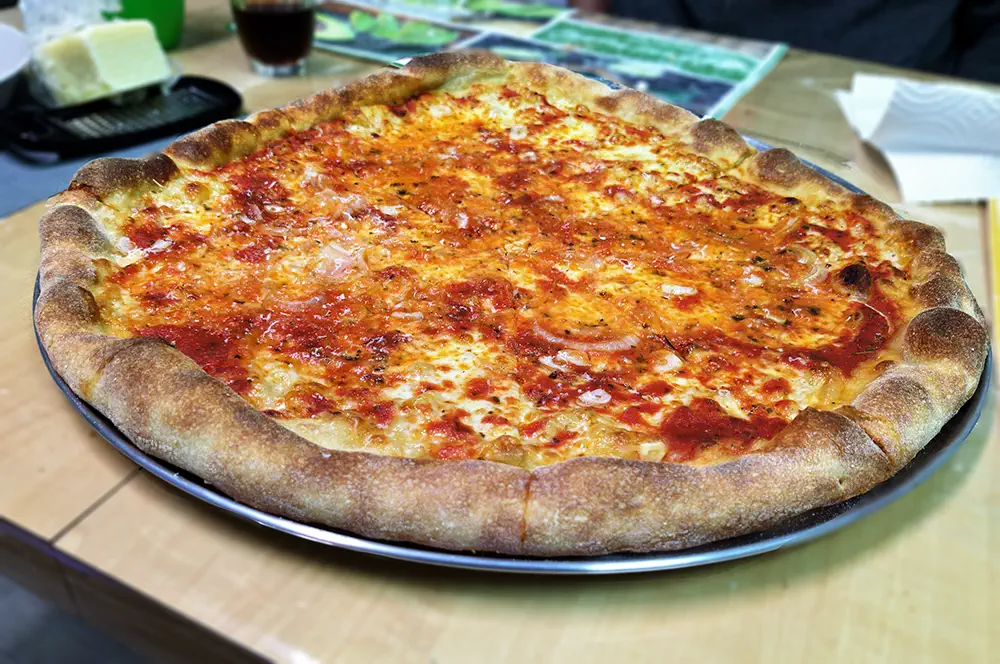
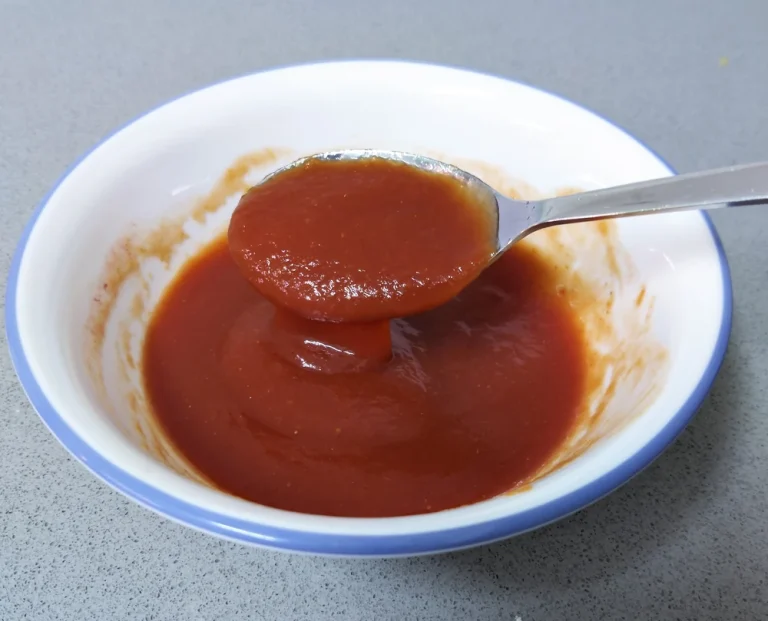
Sauce for New York Pizza
To make the sauce, simply mix crushed tomatoes with oregano and salt, adjusting the seasoning to your taste. For added flavor, consider including 1 tsp of olive oil, one minced garlic clove (or a dash of garlic powder), and a touch of sugar if you find the sauce lacks sweetness.
You can run the tomatoes through a food mill (recommended) or use a (stick) blender to achieve a smoother texture.
You can also adjust the consistency of the sauce by thinning it with a bit of water or thickening it with tomato paste. Alternatively, you can use a mesh strainer to remove any excess water (also thickening it).
That’s it – the sauce is now ready. There’s no need to cook it.
Pre-Baking Instructions
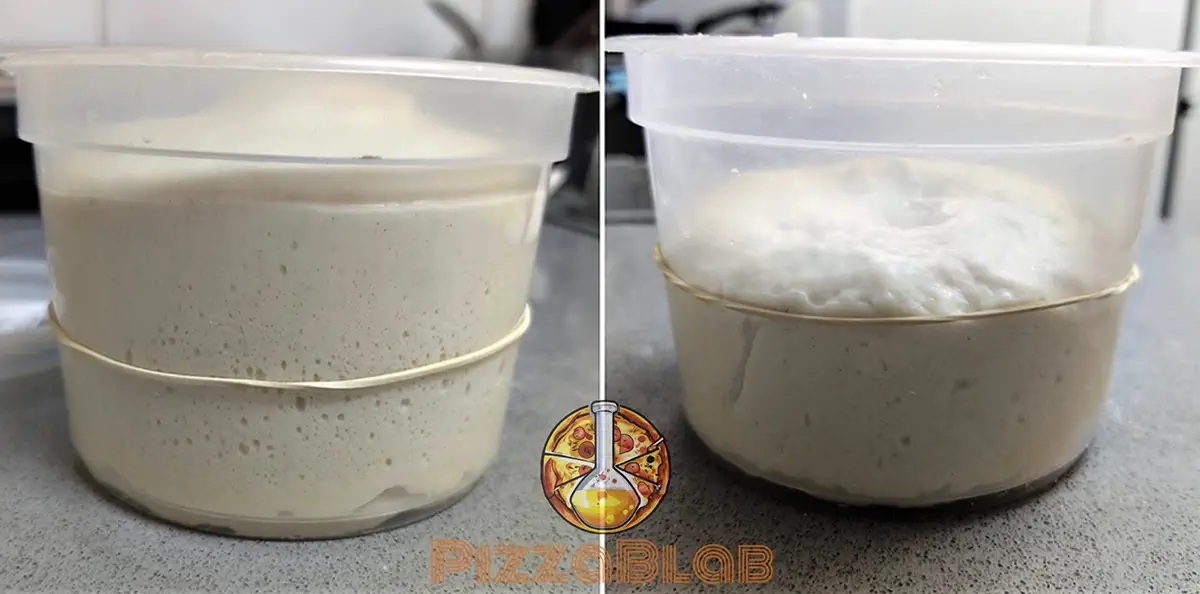
1. Check Dough Readiness: The dough is ready for baking when it has doubled in volume and you can see many small to medium air bubbles at the bottom of the container (see picture and video below).
If you have cold-fermented the dough, remove the dough balls from the fridge approximately 30 minutes to 3 hours before baking, depending on the room temperature. The dough should rest AT room temperature (not reach it) to allow for easier stretching into a pizza base. If it is too cold, it will be resistant and difficult to work with.
You can start working with the dough when it reaches an internal temperature of at least 10°C/50°F (see video below).
2. Preheat the Oven and the Baking Surface: Preheat the oven for at least 30 minutes before placing the pizza. Position the baking surface (stone, steel, or inverted baking sheet) in the center of the oven on the middle rack. Set the oven to its highest temperature using the standard baking setting (upper and lower heating elements, without convection/fan).
If your oven has a ‘quick pre-heating’ function, it is recommended to use it, as it will significantly reduce the pre-heating time.
It is recommended to use an infrared thermometer (which you can purchase from Amazon or AliExpress) to ensure that the baking surface has reached the desired temperature (at minimum, the temperature set for the oven). In most cases, this should take approximately half an hour for the surface and oven to heat up properly.

3. Prepare a Cooling Surface: Prepare a surface for cooling the pizza after baking. Any surface that allows steam to escape from the bottom of the pizza will work.
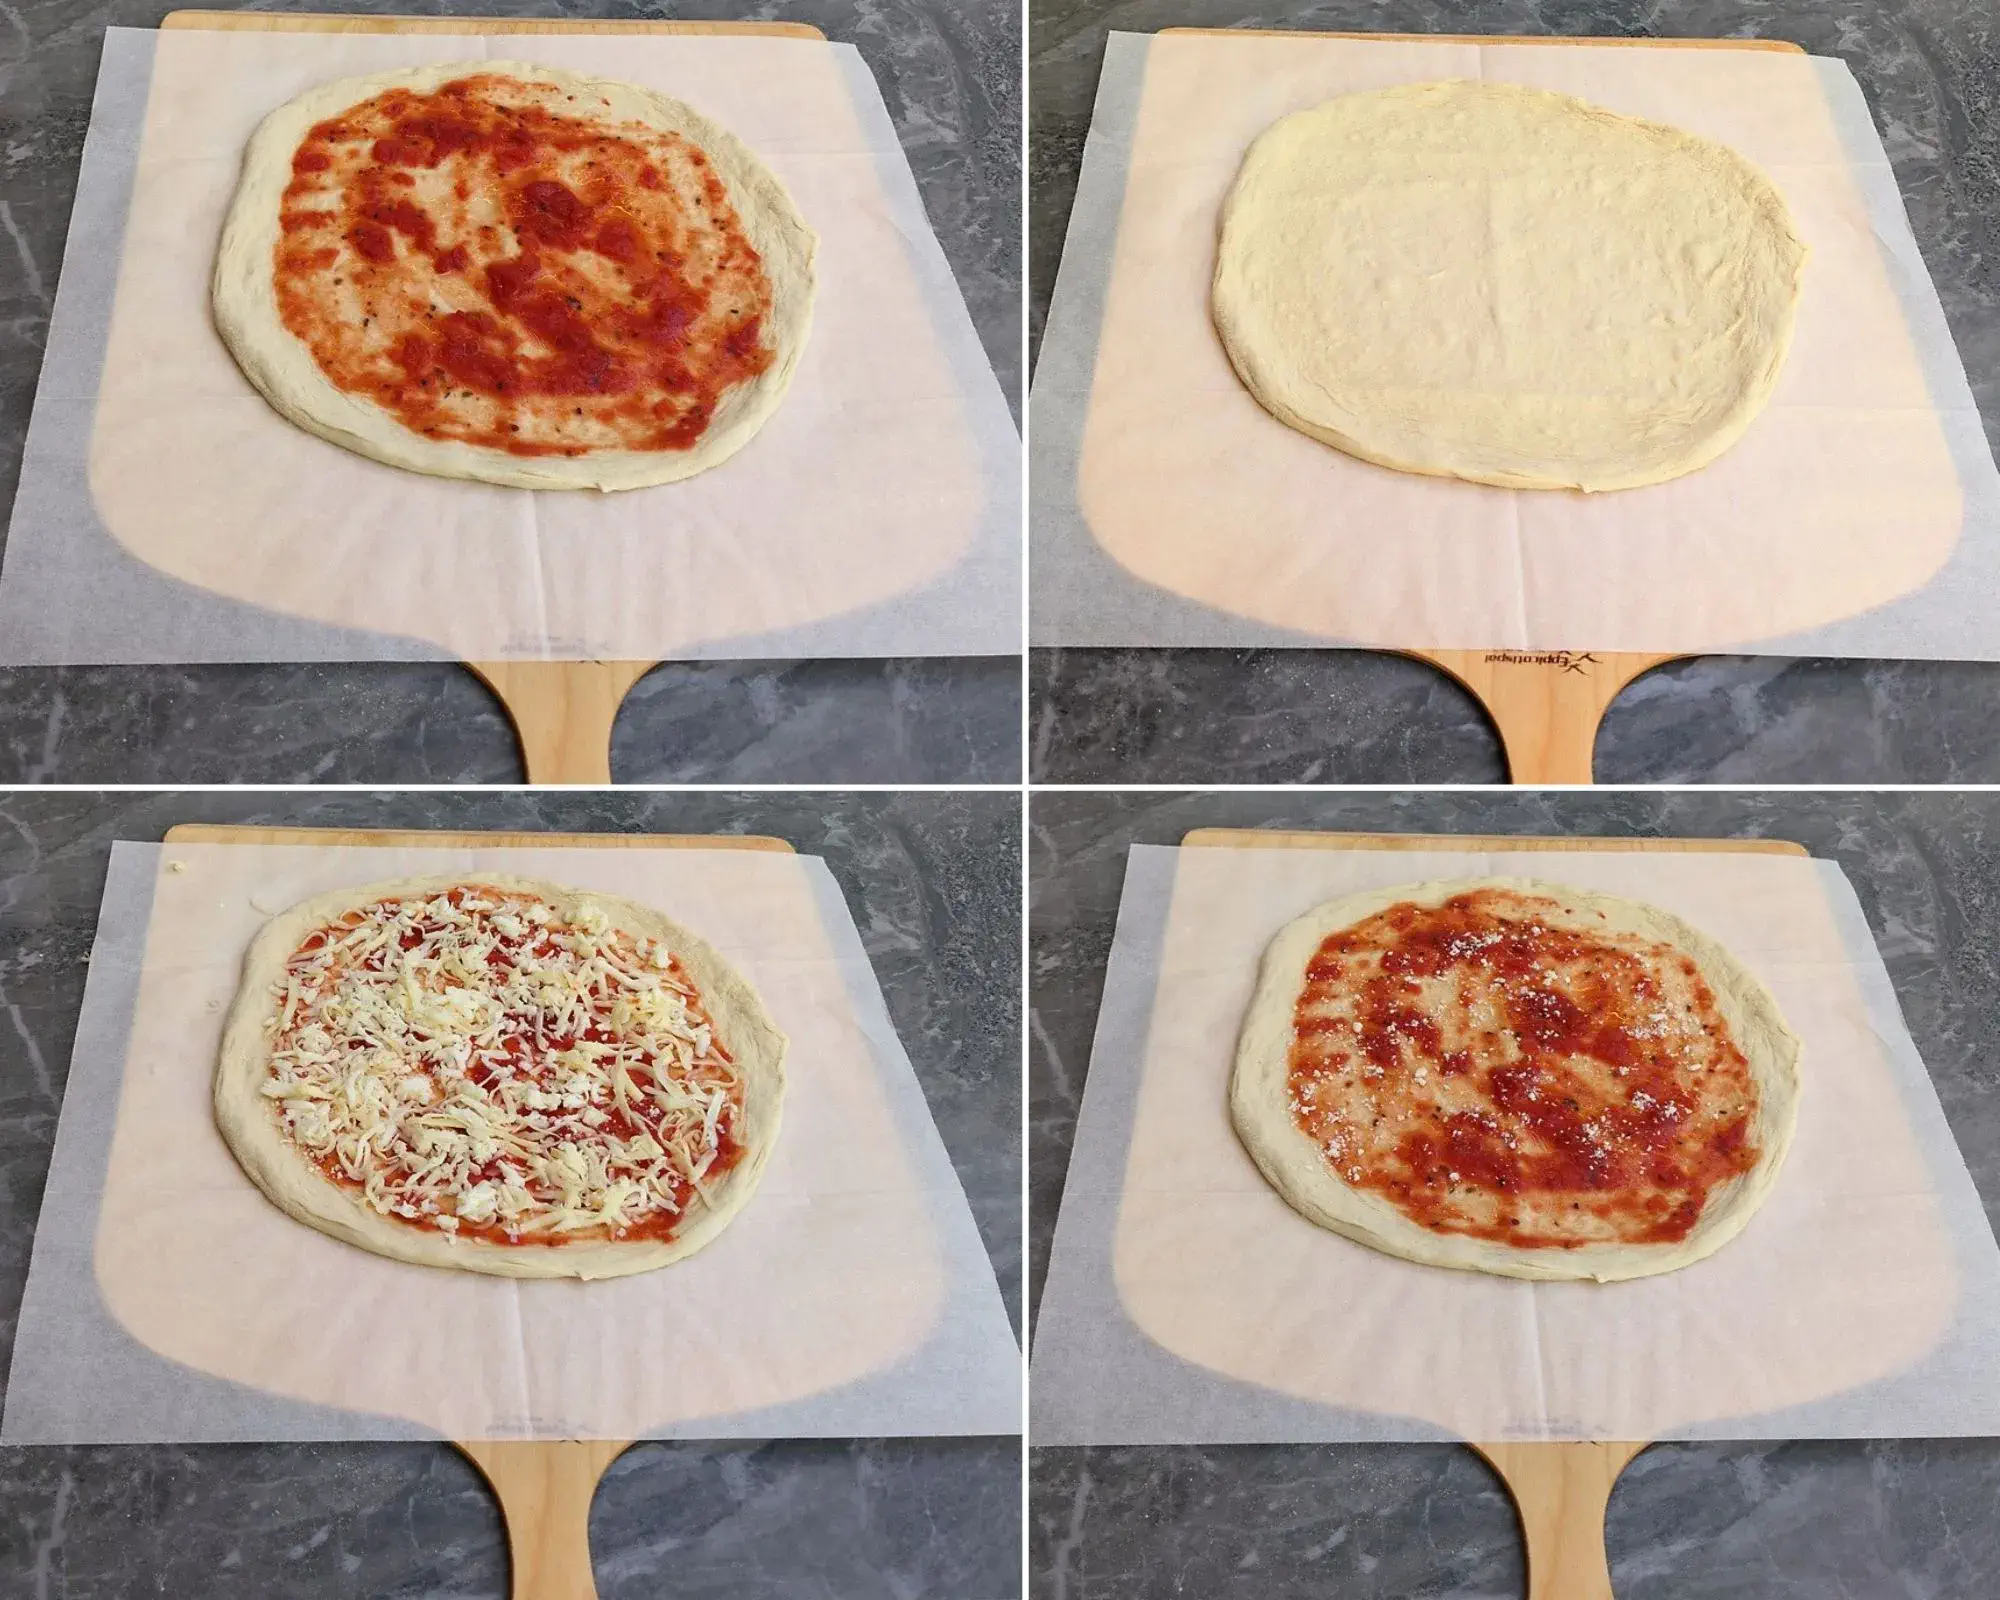
Stretching, Dressing And Baking
Stretching the Dough Ball and Dressing the Pizza
1. Prepare Bench/Dusting Flour: Prepare a wide bowl or plate and fill it with a generous amount of dusting flour. Plain white flour works well.
2. Prepare the Transfer Tool (Pizza Peel): Prepare the tool you will use to transfer the pizza into the oven. If you have a pizza peel, use it; otherwise, use a large tray lined with parchment paper. If using parchment paper, place it on the peel or tray that will be used for transferring the pizza.
3. Flour the Peel: If using a pizza peel, lightly flour it to create a thin layer of flour all over (be careful not to use too much flour, as it may stick to the bottom of the pizza and burn during baking). If using parchment paper or pizza screen, there’s no need to flour them.
4. Remove the Dough Ball From Its Container: Take the dough ball out of its container. If the container was properly oiled before placing the dough in it, simply turn the container over the flour bowl and let gravity do its work – the dough should slide out on its own. You can help it release from the sides of the container with your fingers. If you fermented the dough in a plastic bag, pull the dough ball out or cut open the bag to remove it.
5. Flour and Flatten the Dough: With the dough ball in the flour bowl, press it down firmly with your hand to flatten it. Then, flip it over and flatten the other side as well. Don’t worry about being gentle, you can use some force.
6. Stretch the Dough: Place the flattened dough on a lightly floured work surface. Create a defined outer crust, then use your fingertips to press the center of the dough from the inside out to expand it. Flip the dough over and do the same on the other side.
Once the pizza base has expanded enough, finish stretching it using your preferred method (I recommend using your fists, as shown in the video above).
7. Transfer the Stretched Base: Transfer the stretched pizza base onto the tool that will be used to transfer it into the oven.
8. Dress the Pizza: Start by spreading the sauce, then add the hard cheese (pecorino or parmesan), followed by the mozzarella and the rest of the toppings.
9. Quickly Transfer to the Oven: Once the pizza is ready, transfer it to the oven as quickly as possible to prevent it from sticking to the peel.

Baking Instructions
For a comprehensive guide to baking pizza in a home oven – including methods, practical tips, and techniques – check out this article (recommended): How to Bake Pizza in a Home Oven: Everything You Need to Know [A Practical Guide].
1. Launch the Pizza: Slide the pizza onto the baking surface. Start with a sharp forward motion to release the furthest part of the pizza onto the baking surface; once the pizza touches the surface, continue with small, sharp, and quick backward movements.
Keep in mind that this may require some practice, so don’t get discouraged if it doesn’t work perfectly on your first try. Or fifth.
If you are using parchment paper, you can simply slide the pizza along with the parchment paper into the oven (refer to the video above).
2. Adjust Temperature and Baking Setting: To bake the pizza, use the oven’s maximum temperature on the standard baking setting, with both the upper and lower heating elements, without convection/fan.
If you used the rapid pre-heating function, switch to the standard baking setting after placing the pizza in the oven.
The total baking time will be approximately 6-10 minutes.
Keep in mind that different ovens may require adjustments, such as placing the pizza on a higher or lower rack or using the broiler mode for more or less time.
3. Rotate the Pizza: It is recommended to rotate the pizza after about 3 minutes to ensure even baking.
4. Turn on Broiler/Convection Mode: During the last 2 minutes, you can switch the oven to broiler or convection mode to give the top of the pizza a final browning (optional – not always necessary). Using the broiler or convection mode will speed up the browning of the upper crust, so you can use them as needed.
5. Remove Parchment Paper (if applicable): If you used parchment paper or pizza screen, remove it after approximately 2 minutes (or once the dough has set and firmed) by carefully lifting the pizza and pulling out the paper. While you can leave the parchment paper or pizza screen in for the entire baking process, it is not recommended as it hinders the bottom of the pizza from receiving maximum radiative heat.
6. Remove Pizza From the Oven and Cool: Once the pizza is baked to your desired level, remove it from the oven and place it on a cooling rack or surface. If you do not have a pizza peel to take the pizza out of the oven, carefully use your hands or an oven mitt to transfer it onto the tray that you used to put the pizza in the oven.
Allow the pizza to cool for at least 3 minutes. A pizza that is piping hot can burn your tongue and is less enjoyable in terms of flavor and texture.
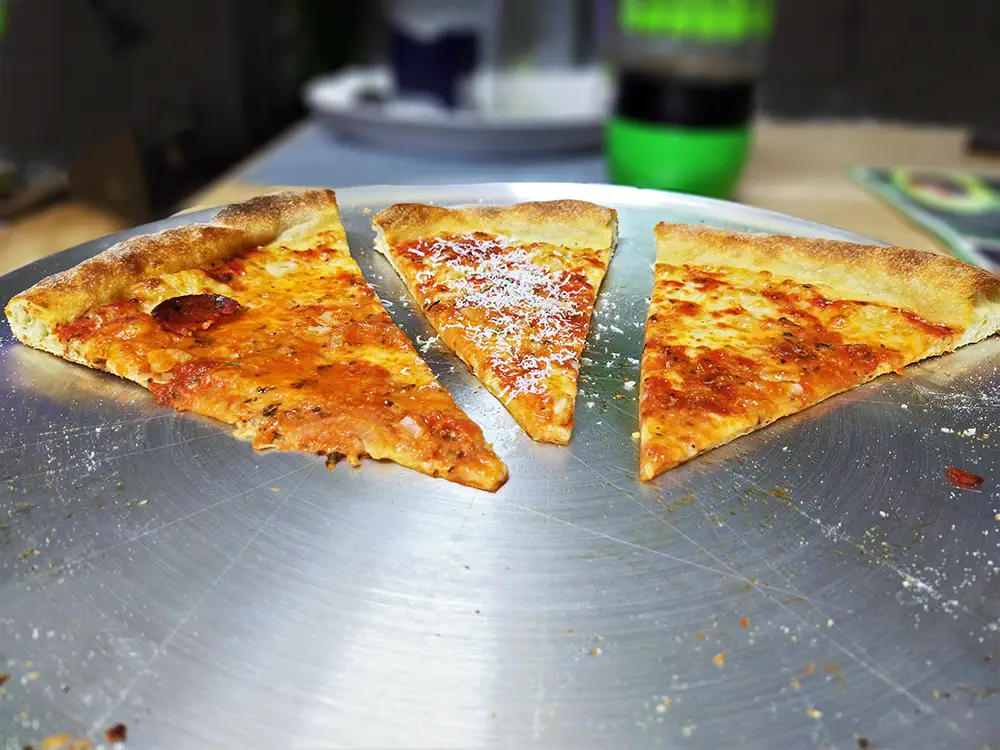
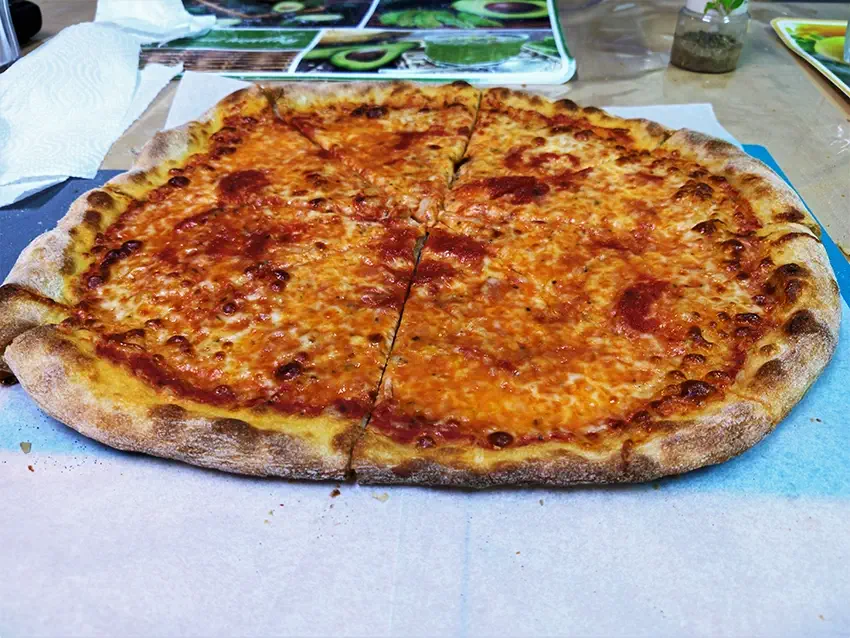
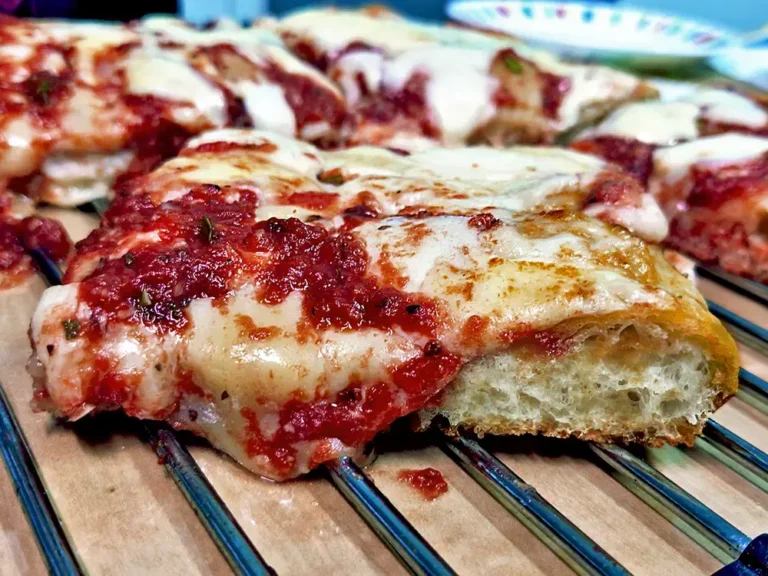
7. Cut and Serve: Transfer the pizza to a serving dish, cut it into slices, and enjoy!
Recipe Summary & Print Version
New York Style Pizza Recipe
Equipment
- Mixing Bowl
- Kitchen Scale for accurately measuring the ingredients
- Precision 0.01g Scale optional – for precise measurement of yeast amount
- Fermentation Container this can be a plastic or glass container, a fermentation box, or even a plastic sandwich bag
Ingredients
Note: These measurements are for one 12" (30cm) pizza. To scale the recipe or adjust for different sizes, use the calculator at the top of the page.
For the Dough:
- 170 grams Flour
- 100 grams Water
- ¾ tsp Salt fine/table salt
- ¼ tsp Yeast instant dry yeast
- ½ tsp Sugar
- ½ tsp Oil any kind
For the Sauce:
- 100 grams Canned crushed tomatoes 3.5 ounces (app. ½ cup)
- ½ tsp Dried oregano
- ⅕ tsp Salt to taste
- ½ tsp Garlic clove (minced) optional
For the Toppings:
- 160 grams Freshly shredded/cut mozzarella cheese (5.6 ounces)
- Parmesan/Pecorino cheese grated
Instructions
Making the Dough:
- Prepare Ingredients: Prepare all the ingredients according to the quantities listed in the calculator.
- Mix: Add the water, salt, sugar, and oil to the bowl and mix them together.
- Add Flour and Yeast: Add the flour and yeast to the mixture. Knead until you achieve a relatively smooth dough with a “creamy” texture. The kneading process should take no more than 5 minutes if done by hand and between 5-10 minutes if using a mixer.
- Divide Into Balls: Divide the dough into balls and place them in an oiled container. Close the container with a lid or cling wrap to prevent the dough from drying out.
- Cold Fermentation: If you cold ferment the dough, it’s important to transfer it to the fridge immediately after kneading and shaping it into balls.
- Fermentation: Allow the dough to ferment until it is ready to be baked, following the fermentation time specified in the calculator.
- Check Readiness: The dough is ready to be baked when it has doubled in volume and you can see many small to medium-sized air bubbles at the bottom of the container.
Making the Pizza:
- Remove Dough from Fridge (If Cold Fermented): If you have fermented the dough in the fridge, remove it and allow it to reach an internal temperature of at least 10°C/50°F. This should take about an hour or two, depending on the room temperature.
- Preheat Oven: Preheat the oven to its maximum heat setting, using both the top and bottom heat (standard baking setting). Place a baking surface such as a pizza stone, baking steel, or inverted baking sheet in the oven. Preheat for at least 30 minutes.
- Prepare Sauce: To prepare the sauce, mix canned crushed tomatoes with half a teaspoon of salt, half a teaspoon of oregano, and a small amount of olive oil. Combine all the ingredients until well mixed. If the tomatoes are not sweet enough, you can add some sugar to the sauce.
- Prepare Bench/Dusting Flour: Take a wide bowl and fill it with bench/dusting flour, which can be regular white flour or semolina.
- Flour the Dough: Remove the dough from its container and place it in the flour, ensuring it is evenly coated. Use your hand to flatten the dough.
- Shape Pizza Base: Transfer the dough to a lightly floured work surface and begin shaping it into a pizza base by pressing from the center outwards with your fingertips. Leave a small outer crust, approximately one centimeter wide.
- Stretch Dough: Once the dough is large enough, pick it up and stretch it using your fists until you reach the desired size for your pizza.
- Transfer Base: Transfer the pizza base onto a floured pizza peel, pizza screen or a large enough tray lined with parchment paper. Alternatively, you can place parchment paper on top of the pizza peel to make it easier to slide the pizza into the oven.
- Dress Pizza: Spread the sauce onto the pizza base, making sure it reaches the edges. Add the cheese, extending it to the edges as well, and then add the rest of the toppings.
Baking:
- Transfer Pizza: Transfer the pizza to the oven and bake it for about 7 minutes, or until the cheese has melted into the sauce and the crust has browned to your desired level.
- Optional Broiler/Convection Mode: If you want to speed up the browning process, you can switch to broiler/convection mode for the last two minutes of baking. Remember that baking times may vary depending on your oven.
- Remove Parchment Paper (if used): If you used parchment paper or pizza screen, carefully remove it after approximately 2 minutes of baking.
- Cool Pizza: Once the pizza is ready, take it out of the oven and place it on a cooling rack or a raised surface that allows steam to escape from the bottom. Let the pizza cool for at least 2-3 minutes.
- Serve Pizza: Transfer the pizza to a serving dish, cut it into slices, and enjoy!
Troubleshooting
Having trouble with your dough, baking, or any part of the pizza-making process? PizzaBlab’s Pizza Making Troubleshooting Page will help you diagnose and solve any problem you encounter.
Enjoyed this article? Join the BLAB
Unlock the Key Takeaways above and enjoy a 100% clean, ad-free experience across the entire site.


Hello!
If i’m going for the stretch and folds, should I wait 15 minutes after the last round, before balling and transfering to fridge?
Hi Flavio,
Yes, it’s best to wait 10-20 minutes after the last set of stretch and folds – otherwise the gluten will be too tight and balling becomes harder. So after the final set of stretch and folds, wait 10-20 minutes, then ball the dough and move to the fridge. Alternatively, you can move the dough to the fridge immediately after kneading, then take it out later for stretch and folds and balling (they don’t need to be done at room temperature).
Hey Yuval,
I made the NY pizza, it turned out great and the instruction were very detailed. However, the pie was a little tough when chewing. What should I pay attention to during the process to keep it chewy without getting tough?
I kneaded for about 5 min before balling, did a CF for 48 hrs and took it out of the refrigerator about 40 minutes before making the pie.
Hi Josh,
In a nutshell, a tough or chewy crust can be the result of several things:
1. High-protein flour: The higher the protein content, the tougher and chewier the crust tends to be. Switching to a lower-protein flour (lower, not low) can help reduce chewiness.
2. Kneading method: The less you knead, the more tender the crust will be. That said, 5 minutes of hand kneading sounds fine. The goal is minimal but sufficient kneading (for more on this: Pizza Dough Mixing and Kneading Fundamentals: A Guide to the Most Important Step in Dough Making).
3. Adding oil (fat) to the dough: Fat significantly reduces chewiness. Even a small percentage of oil can make a noticeable difference (for more on fat/oil in dough: Oil in Pizza Dough: What It Does and Why You Should Use It).
4. Favoring extensibility over elasticity – Anything that promotes extensibility will generally lead to a more tender, less chewy crumb. For more on this: Dough Elasticity and Extensibility: Understanding the Two Most Important Properties in Pizza Dough
Cheers!
Hi!
I’m using effeuno p134ha. Is there a sweetspot for baking temp since that oven can reach 509 celcius.
Hi Arto,
It really depends on your baking goals (crust characteristics, doneness, etc.). I’d start with 300°C top and 280–300 °C bottom, then adjust as needed: if the bottom browns too quickly or too slowly, lower or raise the bottom heat; if the top bakes too fast or too slow, lower/raise the top heat. Just be sure you’re not using a biscotto stone for NY pizza, as its low conductivity prevents proper bottom browning. If you are using a biscotto, you can try raising the bottom heat to 350-400°C.
Thanks Yuval! I have Effeuno’s hybrid stone, biscotto and pizza steel. I’ll try with the hybrid one since it has much better conductivity compared to biscotto.
Great article with lots of practical suggestions. Thank you.
I have a question about the baking temp. You don’t recommend a target temperature in the article, although you do say 300C in your response to Arto. So is 300 what you think is ideal for this dough? And would you shoot for the same in an Ooni?
Please keep this great content coming (and your calculator is great too).
Hi Tom,
Thank you!
As I mentioned in my reply to Arto, it really depends on your baking goals and your equipment; For a home oven, 270-300C (520-570F) is usually the sweet spot for a classic NY-style bake that works well for most doughs and setups.
[Some home ovens only go up to 250C (480F), which isn’t ideal, but still completely doable.]
So to answer your question – yes, I’d start with 300C and adjust from there 🙂
https://www.pizzablab.com/recipes/new-york-style-pizza-recipe/#dough-ingredients-and-quantities-pizza-dough-calculator
re: “Using Italian flours for making New York style pizza is not recommended.”
Notable exceptions include Caputo Americana, Americana Super and Manitoba.
Hi Jon, thank you for your comment!
You’re partially right 🙂 The reason most Italian flours are not (or are less) suitable for NY style pizza (or any pizza baked at lower temperatures, around 570°F/300°C or below) is their naturally very low enzymatic activity. Caputo Americana and Americana Super, as well as Nuvola and Nuvola Super, are indeed exceptions, as they have higher enzymatic activity. Manitoba (and Manitoba Super), on the other hand, has low enzymatic activity and is therefore not recommended for making NY style pizza.
A little DMP added to Manitoba takes care of that little problem. Point is: the statement about Italian flours being inappropriate for NYS is a bit sweeping.
Hi again Jon,
You’re right, but please check the disclaimer at the beginning of the recipe. This recipe (like all recipes on PizzaBlab) is intentionally kept as general and concise as possible, and is designed for a wide audience, from beginners to advanced bakers. Those who want to dive deeper will find dedicated articles covering every step of pizza making, including the use of diastatic malt powder, flour properties, and how to choose the right one based on personal pizza preferences and baking equipment.
I’ll also add that, especially for people living in the US, there’s absolutely no need to use Italian flours for making a NY style pizza, particularly flours like “Manitoba” (which is essentially a European marketing term for American/Canadian strong wheat) or Caputo Americana – both are made from imported North American wheat that’s milled in Europe and then shipped back to the US as flour, often at a higher cost than domestic American bread flours (which is what virtually all traditional NY pizza joints use).
Additionally, most Italian flours are, by nature, significantly more extensible than American flours. Beyond enzymatic activity and browning considerations, this has two implications:
(1) it affects texture, producing a lighter, more tender eating characteristic that drifts away from a classic NY-style profile; and
(2) it can make the dough more difficult to handle, especially when fermenting only in ball form and/or stretching pizzas into the 16–20″ range.
This is why my general recommendation is to avoid Italian flours for NY style pizza – both in terms of the final product’s characteristics and the unnecessary sourcing and cost of a “special” flour. Of course, an experienced baker can achieve good results with almost any flour – but that level of nuance goes beyond the scope of a general-purpose recipe like this one.
Awesome blog! I stumbled across this site search pizza making. Lots a good info here.
This site really upped my NY Pizza.
Thanks Yuval I appreciate the work you put into this site and pizza make.
Now, if I can get this stretching the dough perfected I’ll be good. I can never a good 14 inch dough to stay at 14 inches.
Hi Tony,
Thank you for the kind words, I’m thrilled to hear the site has helped you level up your Pizza game! Regarding stretching – practice makes perfect 🙂
Hi
I am considering making one of the pizzas you wrote about. I am a resident of Malta and so close to Italy and its flour which we get esp. from Lidl.
What can you suggest? I am not new to pizza cooking but nevr bothered about technicalities.
Thank you.
Joe
Hi Joe,
Any flour with 11% protein and above should work (it doesn’t have to be labeled “pizza flour”). I’m not familiar with Maltese flours, but I assume most domestic bread flours will work.
For further reading on how to choose flour for pizza, see:
What Is Pizza Flour? Understanding What Makes a Flour Suitable for Pizza
How to Choose the Ideal Pizza Flour: A Technical Guide